Sunday, November 30, 2014

7 Ways To Create Authentic & Powerful Portraits


Create authentic powerful portraits 1


by Steven McConnell


Do you remember the time you were learning to drive a car?


If you're like most people, it began as a purely technical, logical activity. You had to think about your every move. You were reacting to your environment, rather than anticipating it.


Over time, that settled into a form of unconscious competence. You began to drive by feeling the car, rather than thinking about it.


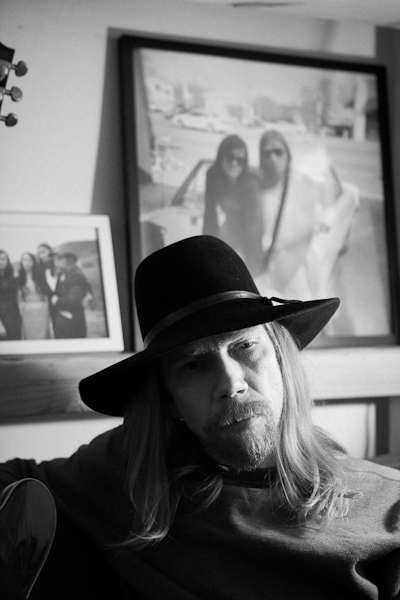
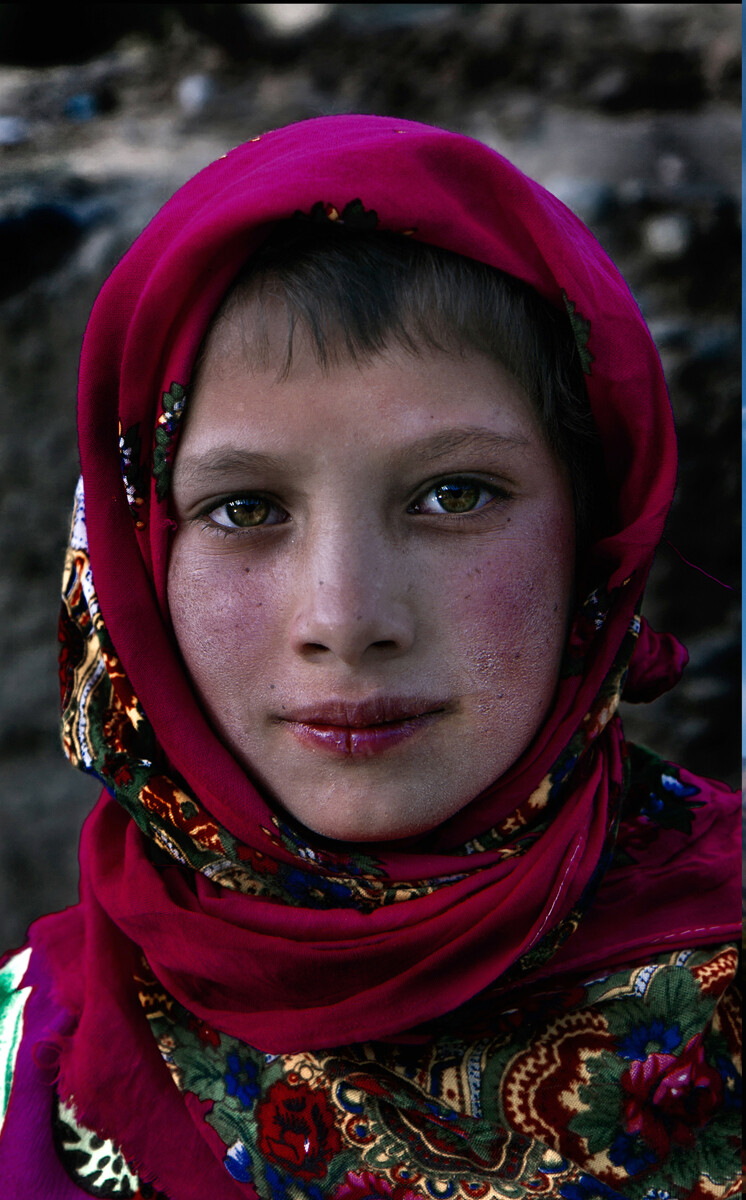
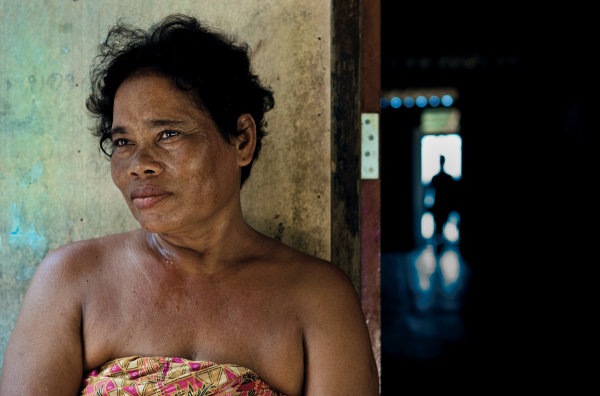
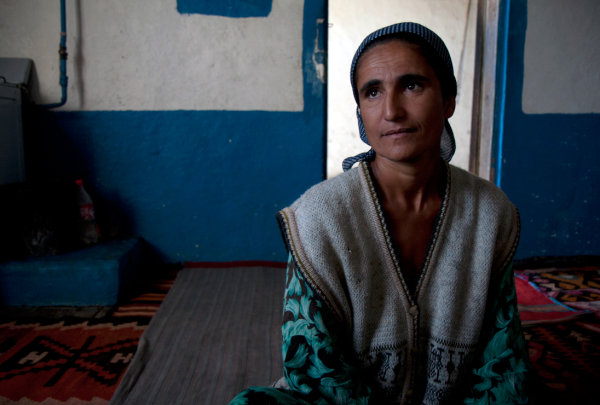
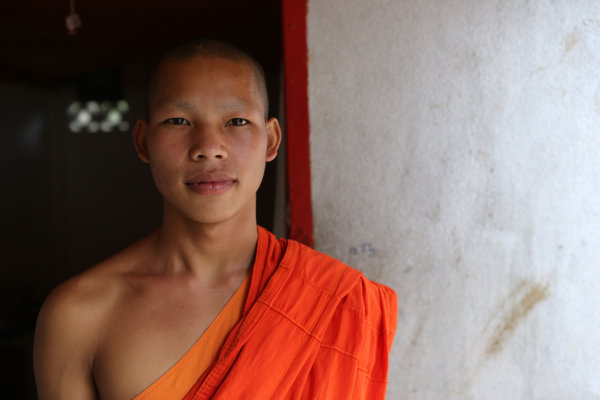
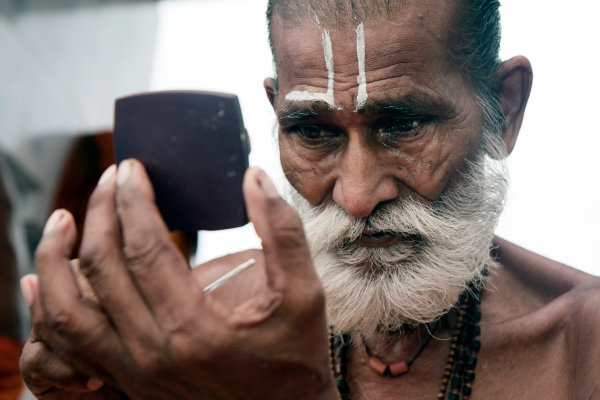
Learning to shoot portraiture is similar. Beyond the mechanical, logical world of preoccupation with gear, ISO, f-stops and focal lengths is a realm of feeling your way around your environment, connecting with your subjects, witnessing their stories and sharing them with the world through your photographs.


It's easy to say, I hear you say. But how do I start moving in that direction?


For me personally this has been a focus of my attention for the past few years and I feel like I'm just starting to scratch the surface. Every time I discover something new I see how much more there is left to uncover.


It's my aim here to share some of my main discoveries with you. I hope that lessons I've learned on my journey to becoming a portrait photographer help you along in yours.


Create authentic powerful portraits 2


1. Forget The LCD


I see so many photographers take a few photos and then bend over to check what they got on the back of their camera.


Meanwhile, their subject is just standing there. Their mood is collapsing. All kinds of weird thoughts are starting to run through their head.


Checking the histograms every now and then is important, but your main job as a portraits photographer is to be aware of, and manage, your subject's headspace.


You can't do it effectively if you're spending more time with your camera than you are with your subject. You need to be completely present with the person you're photographing.


It means you need to photograph a lot and often, until know with a reasonable degree of confidence when you've nailed the shot - without having to check it on the LCD.


Create authentic powerful portraits 3


2. Explore Av & Tv [Aperture and Shutter Priority Modes]


There's a sentiment in the photographer community that you must always shoot in your camera's manual mode because "that's what serious photographers do".


Manual gives you great creative options in certain situations - for example, when you're combining ambient light with strobes.


But be aware that you don't always need it - and sometimes it will shoot you in the foot.


If you're using only natural light, for example, and it's likely to be changing while your subject is moving, the last thing you want is to miss moments while you're chasing exposure.


Try shooting in aperture-priority mode (Av), using aperture to control depth of field as a creative element while dialling the exposure compensation in or out to fine-tune exposure.


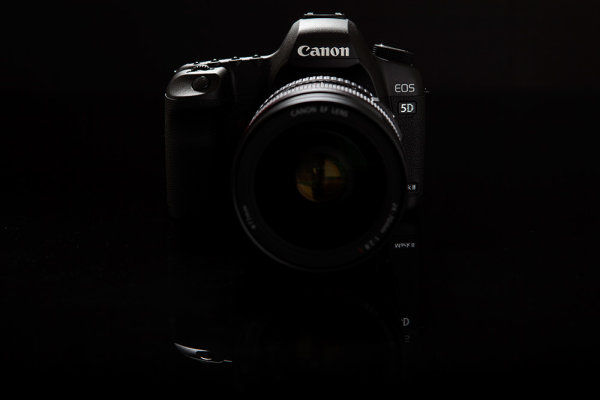
3. Lose The Fat Lens


I shoot with prime lens because I like to have as few physical barriers between me and my subjects as I can.


If I can't look them directly in the eye as I'm photographing them, then I want to look at them through as little metal, plastic and glass as possible.


Also, I think there's a lot to be said about removing everything you can which will intimidate your subjects.


As photographers we tend to view gear as something to get excited about. But in doing so we forget that something like a 70-200 f/2.8 (even a 24-70 f/2.8!) on front of a DSLR can be unnerving to most people.


Create authentic powerful portraits 6


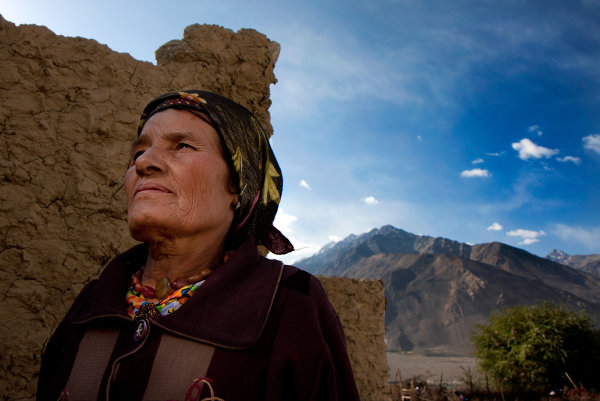
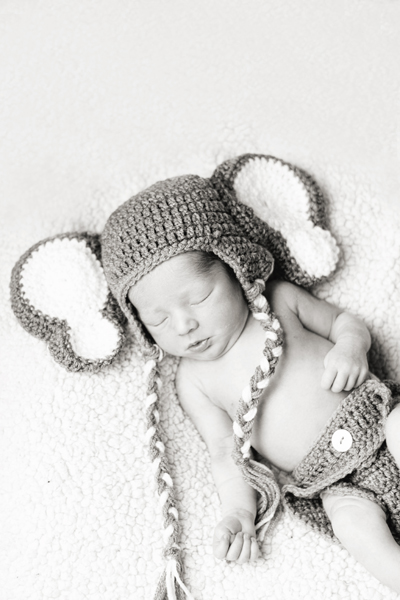
4. Research Your Subjects


When I started photography, I did enough research about cameras to be able to quote the pros and cons of just about any DSLR body out there.


But if you asked me what the person I was photographing wanted to be when they grow up, I'd have no idea.


How can a photographer tell a story about a subject through the photos if they don't know anything about them?


What are your subject's dreams? Obsessions? Fears? Ice-cream preferences? Why do they get out of bed in the morning? What kind of personality they have - quirky, calm, strong, bubbly or intellectual?


Answers to those questions are a great departure point for your creative choices as a photographer.


Create authentic powerful portraits 4


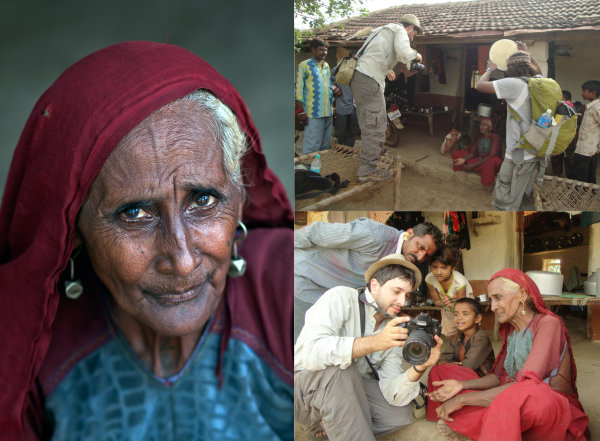
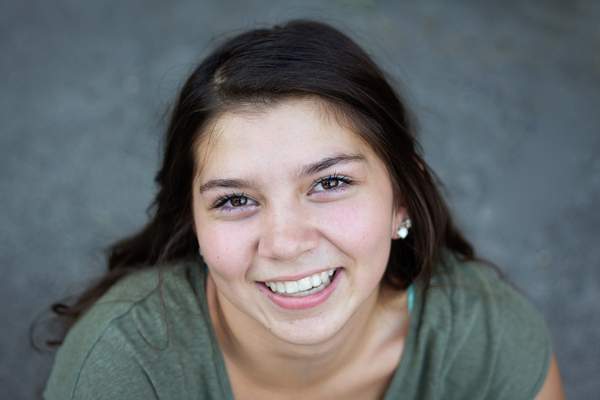
5. Put The Camera Down


I picked this idea up when I was watching this video of Annie Leibovitz photographing Keith Richards:


Notice how at 1:55 she puts the camera down to give him direction. It's not accidental - by doing so, she injects a healthy dose of warmth and intimacy into their interaction. She reminds Keith that there's a real human taking his photo.


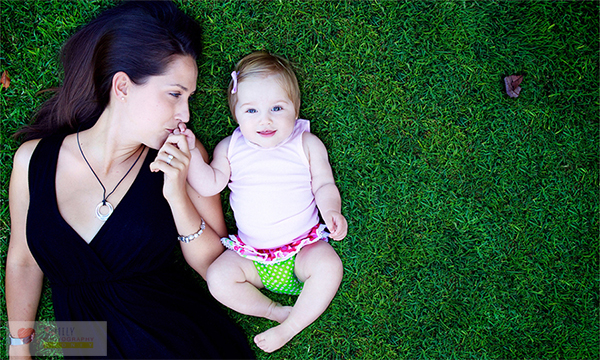
6. Control Your Purpose


How you come across to your subjects is heavily influenced by your purpose in any moment. And that will determine how they act around you.


My default purpose is "Here I am, the photographer, about to photograph you - the subject". Needless to say, it's not very conducive to creating a connection of facilitating a particularly warm dynamic.


Before a shoot I literally have to shift the context through which I view the session to one which helps me set a warmer tone.


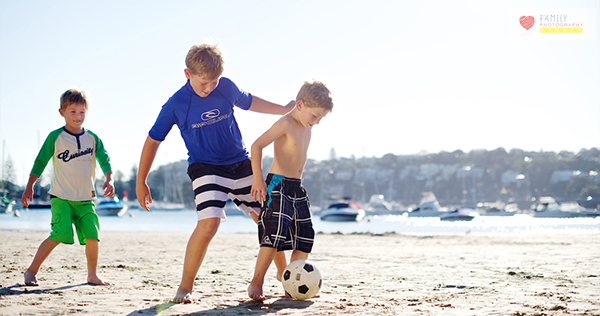
If I'm photographing kids, I'm likely to change to a space of "Let's play - and I'm bringing my camera along". If I'm with adults, I'll probably take things in the direction of "Hey, let's get to know each other - and I'll take some shots along the way".


Connection takes first place, photography second.


Create authentic powerful portraits 5


7. Meditate


This looks odd as a piece of advice on a photography blog. But here's why I think it's useful.


As photographers, we tend to be quite analytical - we go through the world thinking about it, rather than feeling our way around it. We spend a lot of time preoccupied with our thoughts, which can give our emotional tone a somewhat distant edge.


Meditating 10-15 minutes a day will helps you settle down and feel more centred. You will come across as a warmer, more approachable and confident photographer. You will also be more present with your subjects' needs and be able to respond to them (rather than react to them).


It's important because your subjects will largely mirror your emotional tone. The easiest way to help them settle down and connect with you is for you to be calm yourself.


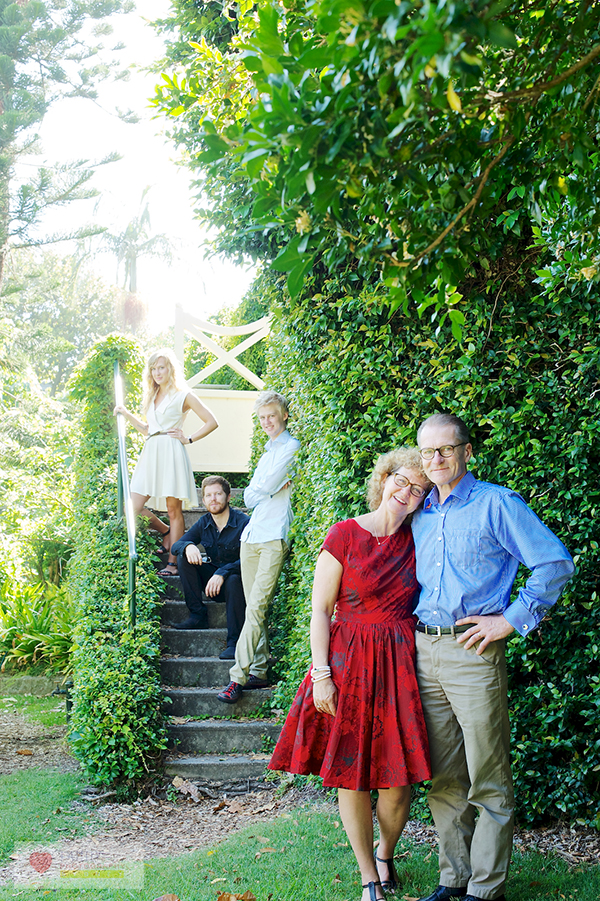
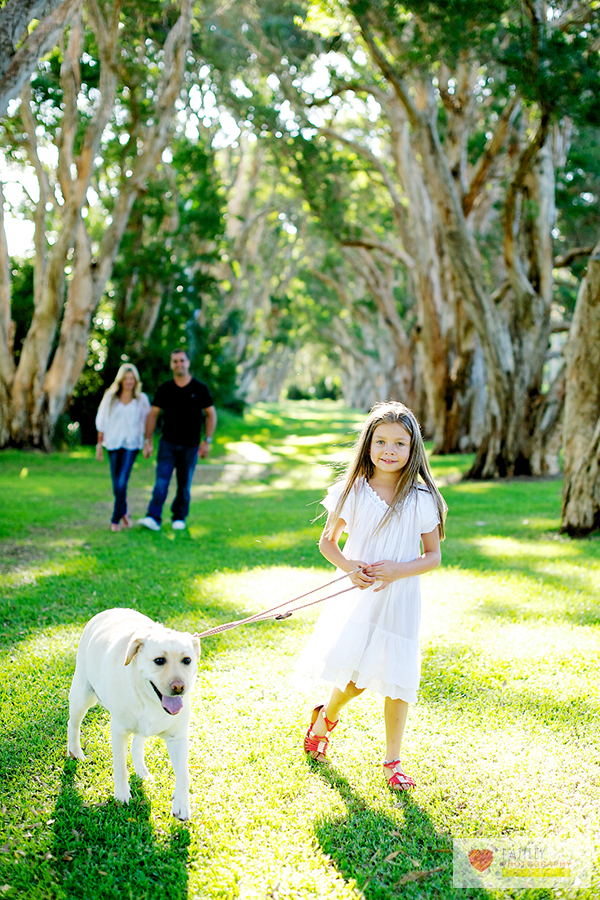
Steven McConnell is a family photographer at Family Photography Sydney. You can connect with him on Google+. and Twitter.


Post originally from: Digital Photography Tips.

Check out our more Photography Tips at Photography Tips for Beginners, Portrait Photography Tips and Wedding Photography Tips.


7 Ways To Create Authentic & Powerful Portraits


Canadian Travelogue – Nova Scotia – Brier Island


Long Island and Brier Island, along with several much smaller uninhabited islands, form the archipelago that lies right at the tip of Digby Neck, a peninsula that juts into the Bay of Fundy. With a population hovering around 300 residents, Westport, Brier Island's only village, cannot help but be relaxing. Consequently I recommend the village of Westport as one of the most relaxing three-day summer holiday destinations in Nova Scotia. There is only one access route to Brier Island: drive west on Highway 217 from Digby for about an hour, and two small ferry crossings.


Brier Island, the outer-most island along Digby Neck, is essentially a comprised of lava-flow-formed basalt rock. While making a beauthiful coastline to photography, it is also brutal on scrapped knees.


Brier Island, the outer-most island along Digby Neck, is essentially comprised of lava-flow-formed basalt rock. While making a beauthiful coastline to photograph and enjoy, it is also brutal on scrapped knees.


There are countless photo opportunities, including rare flora, numerous shore and seabird species (Brier Island is located on the Atlantic Flyway, and autumn is the best season for bird-watching) and spectacular seascape opportunities wherever you choose to "drop" your tripod. Brier Island juts into the lower Bay of Fundy, and the waters surrounding it are the summer home of the nearly extinct Atlantic Right Whale. Endangered humpback whales are also regularly seen in these waters, as are finback and Minke whales and the Atlantic white-sided dolphin.


One of my favourite locations on Brier Island is a stretch of basalt columnar formations along the east and south-east shorelines. Simply park your car at the lot at the end of the road and walk south toward the small monument that profiles the seafaring heroics of Joshua Slocum, the first sailor to circumnavigate the world solo. Really good hiking books are essential here as you will be scampering along a fairly rugged shoreline. Be careful of the slippery seaweed and the tide: you will have great difficulty out-running the rising water if you're caught where you shouldn't be.


One of the quirkiest sights in all of Nova Scotia is the "Balancing Rock." Near the village of Tiverton on Long Island, this precariously perched piece of basalt stands nearly seven metres high and looks as a good wind would blow it off its precarious perch. Not so. It's easy to find, just look for the roadside sign several kilometres west of the Tiverton or ask any local resident.


I first discovered the Balancing Rock in 1991 when working on an editorial assignment and immediately saw its photographic potential. Getting close to it then was quite a chore, but I am pleased to report that a boardwalk now makes crossing the bogs and fens much easier and a really convenient stairway with an observation deck has replaced the knotted hawser once tangling over the cliff edge. It is about a 30-minute trek from Highway 217 and is most definitely a sunrise location.


Precariously perched on a ledge above St. Mary's Bay, local folklore indicates three lobster boats once tried to pull over this rock in unison - unsuccessfully, apparently.  The Balancing Rock can now only be photographed from a viewing platform, so it is highly unlikely you will find any fairies testing their strength.


Precariously perched on a ledge above St. Mary's Bay, local folklore indicates three lobster boats once tried to pull over this rock in unison - unsuccessfully, apparently. The Balancing Rock can now only be photographed from a viewing platform, so it is highly unlikely you will find any fairies testing their strength.


Welcome to this great little archipelago jutting like a finger into the Bay of Fundy and be prepared for many great days of therapeutic relaxing while gulls screech in this working harbour and the smell of salt wafts through the air. Your watch won't be wound quite so tight when you leave - I guarantee it.


Post originally from: Digital Photography Tips.

Check out our more Photography Tips at Photography Tips for Beginners, Portrait Photography Tips and Wedding Photography Tips.


Canadian Travelogue - Nova Scotia - Brier Island


Saturday, November 29, 2014

So You’re Going to Shoot A Wedding: Part 2 of 3 [Day Of]


If you want to know how to photograph a wedding, there are ton of books on the subject but the truth is nothing is going to be a greater lesson than just doing it. This series is not about what shots to take or how to shoot. It's about being a lone ranger vendor with no roadmap. Read Part 1 on the topic of Preparation here.


It's Game Day folks. Your pockets are jammed packed with spare batteries, CF cards, and gum. You're rested and ready. You're a vision of both professionalism and cool comfort. You're terrified out of your mind that you're going to mess up, but no one else can even sense that.


Now what?


IMG_1868b


The Art of Bossy Invisibility


This is the finest line you will walk all day: staying out of the way, but being right in the middle of everything. One of the first things I do when I get started at the ceremony site is to chat with the officiant. At that point, I have (hopefully) already met with the bride and groom and have a feel for if they are the type that want great pictures even if it means me shoving my way in, or if they would prefer that it's a fun night for all of their people and no one even noticed that they had a photographer there.


The officiant may have some very specific thoughts on this too. Either they don't care a bit and feel the couple are in charge, or they may ask you to stay out of the center isle, refrain from obviously standing during seated moments, and similar during the ceremony. It's the hardest part of the whole day-you are there to do a job, but you also don't want to be known as the pushy portfolio-building photographer who couldn't take a hint.


At least 50 times a wedding I have to silently ask myself if the potential shot is amazing enough to risk being intrusive. Sometimes the answer is yes and sometimes it's no. And sometimes I make a bad choice and I find myself obnoxiously close or I miss a great shot. The sun still always rises the next day though.


IMG_0101b


Shoot THEIR wedding, not Yours


I'm a huge flirt. And I don't discriminate with this at all-men, women, kids, babies, dogs, whatever. And while it maybe hasn't made my dating life simple, it's been great for my career and getting people to feel comfortable and look happy quickly and easily.


When this baby started making eyes at me with drool dripping, I forgot where I was for a second and thought, how fun is this shot-this baby oblivious to the union of souls happening mere yards away and instead diggin' on me. The problem with this shot is that, cute as it may be, there is nothing the couple-my clients-are likely to do with it. They may not even know for sure who that baby is for all I know. They hired me for pictures of them, important moments, and candid situations. Not evidence of me flirting with a baby.


Stay true to your style-it's what you were hired for. But always in the back of your mind remember that the end result will be what the couple didn't get to see, what they didn't remember, and what they will treasure for a lifetime.


IMG_0779b_color


Don't Miss the Moments


This is the greatest fear of every wedding photographer; that something will happen and they will miss the kiss. Or the moment when the groom sees his bride for the first time. Or the entire first dance because they somehow got locked in the bathroom and no one could hear them banging on the door, screaming to be let out. (That last one is maybe just my own fear.)


Worrying won't get you anywhere. Odds are, you're not going to miss the big moments. What is more possible though is that by being on high alert every second for hours on end, you'll miss some sweet little situations that could be an image no one expected, yet a perfect capture. Try to be there as an observer that isn't stressed about seeing every little thing happen. You're going to miss some stuff. But you're going to see a lot more than anyone else there. It's the most interesting backstage pass-enjoy the VIP status and use it wisely.


weddingarticle


Shoot The Whole Story


Often couples in an attempt to cut costs, will push back the arrival time of the photographer or ask for ceremony and portrait shots and nothing else. This is understandable: wedding photography is expensive. I personally feel it's the worst corner to cut with the exception maybe of tossing a giant cubic zirconium in platinum, but this is tough to explain to cost-conscience couples.


If this is a wedding you are shooting that in any way will become a part of your wedding portfolio, go above and beyond and shoot even what's not asked of you. To only shoot the ceremony or portraits, leaves you with little to show for your effort and nothing that's enough to impress the next couple you may try to book. This may cost you time you didn't account for or aren't getting paid for, but it will come back to you in the long run when you have a wedding in it's entirety as part of your portfolio. It's also just plain ol' good experience.


IMG_2935b


Make the Retail Shots Meaningful


I am convinced that those bouquet shots that photographers go to so much trouble to shoot at every possible different angle go completely to waste and I'm staying convinced of that until the day I walk into someone's home and see a 16 24 gallery wrap canvas featuring a rose bouquet, laying casually on the alter as if by magic. Flowers are expensive-I get that. And every bride has likely been putting the occasionally thought into what color daisies her bridal bouquet is going to include since she was in the 4th grade. But there's better stuff to document, I promise. Sure, take a pretty flower picture-why not.


Digital is cheap and you likely will have a little down time while people are shoving chicken picatta into their faces (because, promise me, you will never, ever shoot people eating. Don't be that photographer.) But look for the details that are meaningful. Instead of putting the rings somewhere weird and artsy, zoom in close and shoot that shiny new ring on their hand when they aren't looking. When it's casually on their grooms face and they are enjoy a small moment. Photograph the details that will be important years later.


And if you do get locked in the bathroom, don't panic. I have to hold on to the belief that a missing wedding photographer isn't something that goes unnoticed for long.


Post originally from: Digital Photography Tips.

Check out our more Photography Tips at Photography Tips for Beginners, Portrait Photography Tips and Wedding Photography Tips.


So You're Going to Shoot A Wedding: Part 2 of 3 [Day Of]


How Capturing Expressive Eyes Can Be The Key To Good Portraiture


Paul Kostabi


If you look at some of the most famous photographs in history, such as Dorothea Lange's Migrant Mother, Steve McCurry's Afghan Girl, or much of Irving Penn's work, you might notice there's one thing that they have in common, a powerful emotion in the main subject's eyes.


While this is far from a steadfast rule, if you're doing portraiture, street photography, or photojournalism, catching a powerful expression in the eyes can be the difference between a mediocre photograph and the best photo you've ever taken.


If you watch a person's eyes and wait, you can see when they are experiencing something, recalling a moment, or feeling an emotion. That sometimes split second is when you need to take the shot. You can create an amazing composition with gorgeous lighting, but if there is no expression coming through from the subject then the photograph will be lacking. And that expression often begins with the eyes.


It could be a fleeting glance away from the camera as the subject recalls a story or a powerful gaze into the camera. A momentary glance from the eyes can portray strength, fear, romance, nostalgia, confidence, glamour, and so many other emotions.


A good trick to elicit these emotions is to get the subject talking about a meaningful moment in their lives. The more time you are able to spend with them, the more they will open up and the more opportunities you will have to capture these emotions. Or with some, you can even simply state the emotion and they will be able to portray it ("Give me confidence!")


So the next time you create a portrait, make sure to pay special attention to the eyes.


Pushups, Rucker Park


Post originally from: Digital Photography Tips.

Check out our more Photography Tips at Photography Tips for Beginners, Portrait Photography Tips and Wedding Photography Tips.


How Capturing Expressive Eyes Can Be The Key To Good Portraiture


Friday, November 28, 2014

Portrait Photography: How to Photograph People in the Harsh Midday Sun


By: Oded Wagenstein


Great tips and tricks on overcoming the harsh mid-day sun to create beautiful portraits on either side of the "golden hours"


The Golden Time


The best time to take almost any kind of picture, is in the "golden hours": around one hour before sun down and one hour after sunrise, because that's when the light is at its softest, lacking hard shadows, rich in colors, bathing your subject in even light, which entering from the side and that gives your subjects face definition.


-Uzbekistan-  Canon EFS 17-55mm f/2.8  Fstop of 3.5, shutter speed@1\200 ISO 160


-Uzbekistan-
Canon EFS 17-55mm f/2.8
Fstop of 3.5, shutter speed@1\200 ISO 160


-Tajikistan- Canon EFS 17-55mm f/2.8 Fstop of 5.6, shutter speed@1\125, ISO 200.


-Tajikistan-
Canon EFS 17-55mm f/2.8
Fstop of 5.6, shutter speed@1\125, ISO 200.


-China - Canon EFS 17-55mm f/2.8 Fstop of 2.8, shutter speed@1\250 and ISO 400 Natural light (sunrise) entering the frame from the right


-China -
Canon EFS 17-55mm f/2.8
Fstop of 2.8, shutter speed@1\250 and ISO 400
Natural light (sunrise) entering the frame from the right


-Tajikistan- Canon EFS 17-55mm f/2.8 Fstop of 5.6, shutter speed@1\100 and ISO 100 Natural light (sunrise) reflecting from the mountains, which are about 45 degrees to the woman (you can see it in the window).


-Tajikistan-
Canon EFS 17-55mm f/2.8
Fstop of 5.6, shutter speed@1\100 and ISO 100
Natural light (sunrise) reflecting from the mountains, which are about 45 degrees to the woman (you can see it in the window).


Once this time (golden time) has passed, we are left with harsh, unflattering light that is low in saturation and makes the images look dull and flat as you can see in this photo:


-India- Canon EFS 17-55mm f/2.8 Fstop of 8, shutter speed@1\250 and ISO 100 The harsh mid-day sun is just above him.


-India-
Canon EFS 17-55mm f/2.8
Fstop of 8, shutter speed@1\250 and ISO 100
The harsh mid-day sun is just above him.


The Problem


In order to provide solutions, first let's understand the "problem": Your camera doesn't see as well as your eyes. The "problem" is the camera's dynamic range. In plain English, the dynamic range is the distance between the brightest and darkest points in the frame. Let's say you take a shot of a man wearing a hat in the middle of the day, when the sun is at its highest and harshest. Your eyes will be able to make out his eyes even under the shadow of his hat, as well as his chin in the strong daylight. That's because your eyes have the ability to see a large dynamic range.


Your camera however has a far more limited ability to see the dynamic range .If you we go back to our man in the hat, your camera will see his eyes, which are in shadow under his hat as black, while his chin which is in strong sunlight will be blown out and very white.


You might try to "fix it" by changing your aperture/shutter or ISO parameters but, this would only make your image lighter or darker as these actions have no bearing on the dynamic range. Even if we try to use an ND filter, again, this would only make your image darker and would not solve the problem or alter the range.


The Solutions


Move to the shade
Try moving the subject to the shade, or perhaps indoors. When I asked Steve McCurry, the creator of the "Afghan Girl" image, how he works in the mid day sun, he told me that he prefers to work indoors with the harsh light coming in through a window so that it turns to soft even light, and that's really change my way of "seeing" the harsh light as an opportunity of creating great images by moving to the shade or indoors.


-Thailand- Canon EF 24-70 mm f/2.8L Fstop of 3.5, shutter speed@1\100 and ISO 160 This woman is sitting in the shade with strong light coming from the street (to her left). A small piece of paper was held above her head to block the light (flag).


-Thailand-
Canon EF 24-70 mm f/2.8L
Fstop of 3.5, shutter speed@1\100 and ISO 160
This woman is sitting in the shade with strong light coming from the street (to her left). A small piece of paper was held above her head to block the light (flag).


Try turning your subject 45 degrees to the light source (exp: window) by doing so you will be able to create a nice 3D effect.


-Uzbekistan- Canon EFS 17-55mm f/2.8 Fstop of 2.8, shutter speed@1\100 and ISO 500 Natural light (only) coming from the window on the left side of the frame (about 45 degrees)


-Uzbekistan-
Canon EFS 17-55mm f/2.8
Fstop of 2.8, shutter speed@1\100 and ISO 500
Natural light (only) coming from the window on the left side of the frame (about 45 degrees)


-Laos- Canon EF 24-70 mm f/2.8L Fstop of 3.5, shutter speed@1\1600 and ISO 1000 I used the soft light coming through a red robe which was on the right side of the frame, in order to


-Laos-
Canon EF 24-70 mm f/2.8L
Fstop of 3.5, shutter speed@1\1600 and ISO 1000
I used the soft light coming through a red robe which was on the right side of the frame, in order to "sculpture" the light on his face. It also gave the whole image some sort of orange glow.


Create a Silhouette


Expose your image from the background, so your subject becomes a silhouette in some cases it makes for a wonderful image.


You can do so by using the manual exposure (M mode) or by changing the metering mode to spot and measure from the background.


-Thailand- Canon EF 24-70 mm f/2.8L Fstop of 5, shutter speed@1\200 and ISO 100 (on spot metering) Natural light only


-Thailand-
Canon EF 24-70 mm f/2.8L
Fstop of 5, shutter speed@1\200 and ISO 100 (on spot metering)
Natural light only


Burn it Down


Burning the background is not always a bad thing. On the contrary it creates a unique portrait that's different and interesting


-India- Assistant:  Hardik Pandya Canon EFS 17-55mm f/2.8 Fstop of 4.5, shutter speed@1\200 and ISO 200 Natural light only


-India-
Assistant: Hardik Pandya
Canon EFS 17-55mm f/2.8
Fstop of 4.5, shutter speed@1\200 and ISO 200
Natural light only


Reflector


By using a reflector, you can minimize the light range by bouncing light back onto your subject, which will add light to the dark areas. Like this image below. I used a small folding reflector, which I held in my hand while taking the photo.


-Tajikistan- Canon EFS 17-55mm f/2.8 Fstop of 8, shutter speed@1\250and ISO 100 Natural light+ Reflector (gold color) I held in my hand on the lower left side of the frame + warm natural light bouncing off the mud wall


-Tajikistan-
Canon EFS 17-55mm f/2.8
Fstop of 8, shutter speed@1\250and ISO 100
Natural light+ Reflector (gold color) I held in my hand on the lower left side of the frame + warm natural light bouncing off the mud wall


-India- Assistant:  Hardik Pandya Canon EFS 17-55mm f/2.8 Fstop of 2.8, shutter speed@1\200 and ISO 100 This nice lady was sitting in the shade of her house + silver color reflector, coming from the right upper side of the frame.


-India-
Assistant: Hardik Pandya
Canon EFS 17-55mm f/2.8
Fstop of 2.8, shutter speed@1\200 and ISO 100
This nice lady was sitting in the shade of her house + silver color reflector, coming from the right upper side of the frame.


External Flash


Like the reflector, the flash will add more light to the dark areas in turn creating a smaller dynamic range.


-India- Canon EFS 17-55mm f/2.8 Assistant:  Hardik Pandya Fstop of 9, shutter speed@1\320 and ISO 100 Natural light of the background sky + fill light flash (off camera and inside a small soft box) coming from the right side of the frame, about 1 meter in front of the man's face.


-India-
Canon EFS 17-55mm f/2.8
Assistant: Hardik Pandya
Fstop of 9, shutter speed@1\320 and ISO 100
Natural light of the background sky + fill light flash (off camera and inside a small soft box) coming from the right side of the frame, about 1 meter in front of the man's face.


HDR


Taking 3 (or more) exposures of your subject and using this technique in post processing could come in very handy.


-India- Canon EFS 17-55mm f/2.8 Assistant:  Hardik Pandya Fstop of 11, shutter speed@1\200 and ISO 100 Natural light of the background sky + fill light flash (off camera and inside a small soft box, coming from the left side of the frame) + HDR effect in Photoshop.


-India-
Canon EFS 17-55mm f/2.8
Assistant: Hardik Pandya
Fstop of 11, shutter speed@1\200 and ISO 100
Natural light of the background sky + fill light flash (off camera and inside a small soft box, coming from the left side of the frame) + HDR effect in Photoshop.


I would like to thank Hardik Pandya and Linda Burnette for their help on making this article.


Do you have any interesting techniques or methods to overcome the harsh light? Please share in the comments.


Oded Wagenstein is a Travel photographer and writer. He is a regular contributor to the National Geographic Traveler magazine (Israeli Edition) and he is known for his intimate culture portraits. You can join his Portrait & Travel Photography blog and continue to discuss on travel and people photography and get more amazing tips!


Post originally from: Digital Photography Tips.

Check out our more Photography Tips at Photography Tips for Beginners, Portrait Photography Tips and Wedding Photography Tips.


Portrait Photography: How to Photograph People in the Harsh Midday Sun


Prints vs. CDs: When Business Strategies Collide


By Lori Peterson


There seems to be a constant war waged between photographers who sell prints and the "shoot and burn" photographers that give their clients a disc with edited images. Photographers who sell prints think that photographers who sell (or ***gasp***) give away their images on a CD are devaluing photographers and photography as a whole. Photographers who provide discs (whether given or purchased) to their clients think they are just keeping up with technology and client demand.


So, who is right in this war pitting photographer against photographer? Sadly, no one. Not all business models are created the same and neither are photographers. Client demand is a huge factor when creating packages and figuring out what products to sell.


As a photographer, I think it is natural to want to see your prints displayed. However, if you are only selling 4 6 sizes of images, you are not really creating displays for your clients, you are creating pieces for their scrapbooks and photo albums. Seeing your work displayed gives a feeling of accomplishment and a sense of purpose. It also allows clients to see the work every day and remind themselves of how beautiful your work is and how they need to keep updating those wonderful pieces.


In this digital age now, people want to share everything online and save the images to their computer. They don't necessarily want the hard copies of the images, but the ability to create them if they want. They upload them to their computers, their external hard drives, or even cloud storage. This doesn't only apply to younger people, because even older people are learning to use the Internet to connect with their families. Grandma and Grandpa may even be on Facebook just to keep up with photos of their grandchildren and see what is happening on a day-to-day basis with their families. Grandparents love seeing all those new images and most of the time, they don't even care about seeing the watermark from the photographer on them. They just want to see new photos.


Just because you are a part-time photographer or new photographer does not mean that you can only give images on a CD. New photographers think that is the only way for them to give their images to their clients and it's just not so. There are so many options for photographers who solely provide discs because they don't know how else to give their clients their images.


Most professional photographers use professional labs, such as White House Custom Color, Black River Imagining, Miller's Lab, Bay Photo Labs or Mpix Pro. How do you know which lab is best for you? Most labs will offer to do test prints for you so that you can see how your particular images will look when transferred from your computer and screen to their paper. Setting up accounts with most labs is pretty easy as long as you have a Tax ID number.


Educating your client on the differences between a professional lab and a discount store lab is very important. The test prints you get from your lab can help your keep your monitor calibrated which helps to ensure that what is seen on the computer screen matches what is printed. This is not a guarantee, sometimes not even close enough to be passable, from a discount lab. There can be huge color shifts, variations in overall tones, and the photographer has lost all control of the quality of the output of their final images.


If you are giving your images on CD, you need to think about presentation and packaging. Just handing a burned CD with their name written in Sharpie doesn't make for a professional presentation. You can create white CD labels with your logo or a photo simply and cheaply. You can even order blank CD/DVDs from labs that have your logo on them and then just burn the images onto the discs as you sell them. There are so many options out there that can help make your presentation of CDs beautiful and unique. For instance, you can use these simple brown kraft envelopes and place them inside the banana leaf sinamay envelopes. It's relatively inexpensive and looks so much nicer than just handing over a CD.


Image 01


You can customize boxes or folders to present your CDs in when you give them to your client. You want it to represent your photography, your business, and your brand model as a whole. It doesn't have to cost an arm and a leg, but it should come across as a representation of your business and what you provide.


Image 02


The final images can be placed inside the box on some beautiful fabric or you can purchase bags to separate them inside the presentation boxes. Again, this is very inexpensive to do, but makes the presentation so much more beautiful and shows the attention to detail you provide in every aspect of your business.


Image 03


They key component is not which is technically "right", but which fits your business model. If you are pricing your sessions correctly and including the price for the CDs then you are doing what best fits your business. Giving the CDs away actually does very little to help clients value your business and the time and energy that was spent into creating, editing, and presenting your images. The same goes for providing prints so cheap that you are trying to compete with discount store pricing.


You need to value your business. You need to know your worth. Does the cost of whatever product you are providing help maintain your business or are you just throwing money away trying to get clients to walk in the door? If your business is not making money or at least breaking even, then you really need to figure out where you are losing your money. Is it from not selling prints or from including a CD with every order?


There are resources you can go to if you need help figuring out what to do and what your business can afford. The bottom line is that you have to do what makes your business successful, profitable, and provide a professional looking end product to your client. Photographers spend much of their time trying to figure out how to get clients and in the end your presentation of their products can be the difference in showing them if you are truly a professional or you are just a hobbyist making money on the side.


The presentation resources in this article are available from Le Box Boutique. Digital Photography School readers can use the code PHOTOGRAPHER10 for 10% of any purchase from Le Box Boutique.


Lori Peterson is an award winning photographer based out of the St. Louis Metro Area. Her dynamic work ranges from creative portraits to very unique fine art photography. Lori's work can be seen at www.loripetersonphotography.com and also on her blog at www.loripetersonphotographyblog.com. You can follow her on Facebook at https://www.facebook.com/LoriPetersonPhotography.


Post originally from: Digital Photography Tips.

Check out our more Photography Tips at Photography Tips for Beginners, Portrait Photography Tips and Wedding Photography Tips.


Prints vs. CDs: When Business Strategies Collide


Thursday, November 27, 2014

Photographing Tweens and Teens


By Lori Peterson


Booking teens and tweens for photo shoots is always fun. They have so much energy and enthusiasm and it really shows once they step in front of the camera. For that time when they are in front of your camera they feel like they are celebrities. That can be good for fragile egos and low self-esteem, especially when their hair and makeup is done and they look absolutely gorgeous.


Teens and tweens of today have seen enough modelling shows that they know the drill for posing. Some of them even have that runway walk down too! It's very easy as a photographer to get swept up in our posing and our images and we can forget how old (or young) our client really is.


Keeping yourself engaged with your client and talking about school, their friends, music they like (which you may have never even heard of!) can be easy ways to make them feel at ease and remind you of who is in front of your camera. Keep their posing simple, not too suggestive.


Tweens and Teens Photography 01


Wardrobe seems to be a fairly contentious subject when it comes to teens and tweens, but I have the rule that if the parents have seen the wardrobe and have no problem then it's not for me to judge. You want them to look like themselves and you don't want it to look too out of their norm or they won't want to show the photos off to their friends.


Tweens and Teens Photography 02


You aren't there to parent them or to lecture on them their choice of clothing; you are there to take portraits. This is why consults before the shoot are so important. Going over wardrobe is one component that you should incorporate into your shoots so that you can decide where best to pose them and what works best for each location. Going over wardrobe also includes shoes, jewellery, and even hair and makeup. Talking to the parents about their expectations for the shoot is also very important.


Go over your contract with both the client you are shooting and their parent and let them know what your own expectations are during the shoot. Let them know about whether you allow parents to take photos during the shoot with their cell phone or with another camera too. Let them know what your policies are regarding afterwards when the photos are posted to social media. A lot of photographers have issues with people re-editing their images or cropping out their watermark. If you outline your specific rules for your images verbally and in your contract then you have a smaller chance for clients violating those policies.


Tweens and Teens Photography 03


Working with teens and tweens can be a lot of fun for photographers. They might be a little uncomfortable in the beginning, but once you get them started with the shoot and talking, it will almost be second nature for them to be their natural selves and let their personalities shine through. A lot of parents prefer these types of photo shoots for their teens and tweens to the traditional school portraits because you can see their personalities and their uniqueness in the images.


Lori Peterson is an award winning photographer based out of the St. Louis Metro Area. Her dynamic work ranges from creative portraits to very unique fine art photography. Lori's work can be seen at www.loripetersonphotography.com and also on her blog at www.loripetersonphotographyblog.com. You can follow her on Facebook at https://www.facebook.com/LoriPetersonPhotography.


Post originally from: Digital Photography Tips.

Check out our more Photography Tips at Photography Tips for Beginners, Portrait Photography Tips and Wedding Photography Tips.


Photographing Tweens and Teens


Five Self Assignments That Teach You To See


In my 20 years in photography, I've seen a lot of different assignments teachers have given their students. Most I have heard, or been given myself from time to time, have centered around learning to use the camera. Things like "Use Only One Exposure Mode", "Use Only One Lens", or "Use One Aperture Setting". The most interesting to me, from a photographic standpoint, involved learning to see. The reason I say this is that simple camera use can be easily learned. It's basic math when you boil it down. But learning to see creatively, learning to compose a shot, takes much more than learning buttons, dials, and controls. These self assignments force you to look around you, to really see what you're shooting and try to make interesting images.


1. Pick A Color


Pick up your camera and choose a color for the day. Go out and make images with that color as a dominant element in the image. Find as many different ways as possible to do this.


This image I went in search of things red. 1/320, f/7.1, ISO 1000. EOS 5D Mark II, EF 100mm f/2.8L IS Macro.


This image I went in search of things red. 1/320, f/7.1, ISO 1000. EOS 5D Mark II, EF 100mm f/2.8L IS Macro.


2. Pick A Shape


Choose a shape and create images which use that shape in an interesting way. It could be features in architecture, artwork, or juxtaposition of multiple structures. Squares are relatively easy. Start there, and then search out triangles, circles, or combinations of shape. Again, look for the most interesting composition you can to highlight that shape in your image.


I ventured into Central Park in New York City without a real game plan in mind. I found a sundial and started shooting that, and then went in search of more circles. Found this ironwork and used it to frame a pair of lovers in a rowboat. 1/160. f/2.8, ISO 100. EOS 5D Mark III, EF 24-70 f/2.8L II at 24mm.


I ventured into Central Park in New York City without a real game plan in mind. I found a sundial and started shooting that, and then went in search of more circles. Found this ironwork and used it to frame a pair of lovers in a rowboat. 1/160. f/2.8, ISO 100. EOS 5D Mark III, EF 24-70 f/2.8L II at 24mm.


3. Shoot Something Different


If you're like me, you probably have one type of subject you gravitate to more than any other. But it's easy to get too comfortable, and miss opportunities to make great images, when you're only looking for one thing. Once in a while it's a good idea to change things up and shoot something different. If you're a sports shooter, try shooting a still life. If you're a landscape artist, try shooting macro. These types of exercises forces you out of your comfort zone and helps you learn to see in a new way.


Normally I'm a landscape guy first. But I decided I wanted to try a still life of one of the tools of my trade.  I used some black plexi as the table, and black matte board for the background. I used a single speedlite in a softbox above and behind the subject. EOS 5D Mark II with EF 24-70 f/2.8L II. 1/200, f/8, ISO 100.


Normally I'm a landscape guy first. But I decided I wanted to try a still life of one of the tools of my trade. I used some black plexi as the table, and black matte board for the background. I used a single speedlite in a softbox above and behind the subject. EOS 5D Mark II with EF 24-70 f/2.8L II. 1/200, f/8, ISO 100.


4. Shoot Reflections


Reflections are a powerful element in photography, but I'm almost embarrassed to admit how long it took me to actually start SEEING them. I had a "lightbulb moment" one day when shooting with a friend of mine, and since then, I am constantly looking for reflections as an element in my work, whether it be portraits, landscapes, or still lifes.


This is probably the most photographed puddle in New England, but it's great for producing a reflection of Pemaquid Point Lighthouse. Reflections add interest to images so always be on the lookout. EOS-1D Mark IV, EF 16-35mm f/2.8L II. ISO 100, 1/20, f/16.


This is probably the most photographed puddle in New England, but it's great for producing a reflection of Pemaquid Point Lighthouse. Reflections add interest to images so always be on the lookout. EOS-1D Mark IV, EF 16-35mm f/2.8L II. ISO 100, 1/20, f/16.


5. The 15 Foot Circle


Stand in the center of a room, or wherever you happen to be. Make photographs only of subjects that happen to be within 15 feet (or 10, or 5) of where you're standing. Give yourself a time limit. Exhaust all possibilities. Get as many images as you can using only that area before moving on. This kind of exercise forces you to really look at things and work to compose interesting images.


I was standing in a dining room at the holidays last year and decided to try the 15 foot circle. This was a line of candles on a fireplace mantle. EOS-1D X with EF 70-200 f/2.8L IS II. ISO 400, 1/250, f/2.8.


I was standing in a dining room at the holidays last year and decided to try the 15 foot circle. This was a line of candles on a fireplace mantle. EOS-1D X with EF 70-200 f/2.8L IS II. ISO 400, 1/250, f/2.8.


For beginners, these assignments are great for learning to see. For more experienced photographers, these are great ways to stay fresh, to restart the creative eye when you're feeling blocked, or to just do something different. What other self assignments have you tried to refresh your photographic vision?


Post originally from: Digital Photography Tips.

Check out our more Photography Tips at Photography Tips for Beginners, Portrait Photography Tips and Wedding Photography Tips.


Five Self Assignments That Teach You To See


Wednesday, November 26, 2014

Photographing in Airports


Miami International Airport Terminal


Ahh, the joy of travel photography, who doesn't love that? But like everything in life, all that glitters is not gold. For travel photography, you actually need to travel, and in many circumstances, air travel and lengthy waits in airports are common.


Nobody likes being stranded in a terminal for hours, or experiencing delays, missed or long connections, all of which happen pretty often. But it can be different for us, the ones who embrace photography. Instead of just sitting there doing nothing, we can have some fun doing what we enjoy the most. At least, that's what I do - and believe me, the time goes by much quicker when you are there with your camera in hand.


New American Airlines terminal in Miami


Despite the obvious of not photographing in prohibited areas, you shouldn't encounter any problems wandering and snapping away. I was a bit skeptical the first time, especially in the US, however, I've never had any issue.


Perhaps you are thinking that there are not interesting things to photograph in airports. Well, think again. These can be rather compelling places; they come in all forms, shapes and colors.


There are always appealing activities around the tarmac and you can shoot through a window. Just be on the lookout for opportunities. The image below was shoot with an iPhone. I didn't have my camera handy that day and I was rushing to the gate; it was raining and I thought the water drops on the glass made it somehow exciting.


IMG_0701


Watch out for unique architectural features. It could be a modern place, a recently built structure, or just a small terminal on a remote exotic destination. Walk around slowly and try to find what makes that place different, sui generis. This colorful skybridge in Miami called "Harmonic Convergence" is a good example of an art installation that is unique to the airport and can't be found anywhere else. When you spot a space like this, take your time, try different angles, and if necessary wait for the right moment to happen.


Person rushing out in airport


Massive glass walls are most likely to be present in contemporary terminal halls and waiting areas. These are wonderful to work with and you stand a chance of getting great photos. Just meter the light to get a good exposure of the exterior during daytime and the interior will be probably e dark or underexposed. This juxtaposition creates a great contrast; it is then possible to play with forms and figures of people standing or walking by. Silhouettes against a brighter background are always fascinating.


20140525_untitled_0002


You can also think of hallways, food courts, waiting areas and shopping areas. You can really do a lot and it will be much better than just sitting there doing nothing and getting bored. After all, you'll be fastened to your flight seat for some hours, so what better way to kill the painful wait by just having some fun photographing the airport?


There you have it - next time you need to spend some time at the airport, just pull out the camera and fire away. It will be fun, I promise.


Editor's note and disclaimer: the suggestions made in this article are by the author and you need to be aware of the legalities and possible issues of taking photos in an airport, as different rules may apply in different countries. It is not a public place so you do not automatically have blanket approval to take any person's photo. You could possibly be asked to stop, have your camera seized or be restricted from getting on your flight. Practice with extreme caution. dPS is not responsible for any damages resulting from following these tips.


The post Photographing in Airports by Daniel Korzeniewski appeared first on Digital Photography School.


Portrait Consultations: Two Questions That Make A Big Difference


Consult (1)


I vividly remember the first time I was asked to take photos for someone that I didn't know. We had friends in common, and she had seen some of the photos that I had taken of friends and family, but we had never met. We talked over the phone, and arranged a time for me to come to her home and take some photos of her daughter. The big day arrived a week or so later, and I was SO nervous. I wasn't sure what her home looked like, or what the lighting situation would be, or whether her daughter was sitting up by herself yet or not. I didn't know how long I should stay, whether I could ask to rearrange furniture, or how the photos that I took would be used. Going into the session, I didn't feel like I was in control, and I didn't like it one bit.


After that, I began doing portrait consultations with new clients. We would meet for coffee, and I'd casually ask questions about their favorite things to do as a family, favorite colors, favorite books, and whether they liked candid photos. My hope was that this type of a consultation would let us get familiar with each other, and feel like a casual coffee date between new friends. This was a major step in the right direction compared to having no consultation at all, but I still wasn't getting the information that I wanted, and it was largely because I tended to dance around the questions that I really wanted to ask, rather than asking them directly.


Now, I approach consultations much differently; including a list of specific, direct questions that I ask each and every potential client. I ask what they're planning to wear. If the session includes children, I ask about the kids' favorite songs, TV shows, or books. I ask whether they prefer more formally posed images or candid images. Do they prefer color photos or black and white photos? Are there any locations that have special meaning to their family? I ask a LOT of questions during portrait consultations, but have realized that there are two questions in particular that are the most crucial in allowing me to better understand my clients' wants and needs for a session, which in turn allows me to produce a better end product for them.


#1 - Is there anything you want to make absolutely sure we capture during your session?


Consult (4)


One mom shared with me that while she had called me for family portraits, she was also getting ready to apply for a new job and wanted a photo of her by herself that she could use for her LinkedIn profile. Another mom told me that she was working on special memory books for her children and wanted a photo of herself with each child individually. I've had requests for newborn sessions to feature specific hats or quilts made by family members, and I've even had requests to feature specific tattoos during portrait sessions. One family asked if they could bring along a bunch of crazy hats, goggles, and glasses for a silly photo or two. Almost every single time I ask the question, I'm blown away by the concrete information about the client's hopes for our session that I may never have known had I not asked the question specifically and directly.


Consult (6)


Very rarely, asking this question also reveals that I'm actually not the best fit for that particular family's wants and needs. For example, during a consult with one potential client, she told me that their family was very casual, and that they really wanted some lifestyle photos in their own home, maybe with them and their children baking or drinking hot chocolate in their kitchen. I LOVE that style of photography, and kept thinking that we were really on the same wavelength and that it would be a great session. Later on during the consult, I asked if there was anything that she wanted to make sure we captured during her family's session. At that point, she pulled up a Pinterest board that contained images of a family drinking hot chocolate and baking. The problem was that her inspiration images were actually all from a stylized session from another photographer, and as we continued to talk, I realized that they weren't actually "inspiration" - she actually wanted me to recreate that session exactly, down to every pose and every prop, which I was not willing to do. I am so thankful that we had a consultation prior to her session, and that I asked some very direct questions which allowed us to get past the general and on to the specifics of what that potential client really wanted, because it simply wasn't something that I could offer.


2. How do you plan to use the images from our session?


Consult (5)


Again, such a simple question that can give you such helpful information going in to a session. Upon asking that simple question, one dad told me that they had a wall in their house that they'd like to fill with portraits of each of their four children, also that they'd like them to be an 11 14 canvas print in vertical format and they'd like all four to be black and white images. Knowing this in advance was so helpful because I was able to really be intentional about creating portraits of the four kids that would look cohesive when grouped together by making sure that the background, lighting, and posing were similar for all four children. In addition, I knew that it was probably wise to include more vertical black and white images in the end gallery than usual, because it was the most important thing for that particular family.


Other clients have told me that they already have their Christmas card picked out, and are just waiting for a photo to complete the card. Being able to see the card template in advance can help me visualize the "feel" that want. There has been at least instance when I've suggested switching locations once I saw the card that they had selected - family portraits in a field would have worked well for a shabby chic card, but just didn't seem as well suited for the ultra modern, minimalistic design the family had chosen. A simple location change really made a big difference in the cohesiveness of the session and their end goal!


Consult (2)


In general, I prefer to meet in person for pre-session portrait consultations. Sometimes, that doesn't happen due to my schedule (or theirs) and we end up doing a consultation over the phone or via email. In those instances especially, I think it is absolutely vital to ask a few specific, direct questions. Don't beat around the bush - ask the questions clearly and concisely, and then listen. Really listen. Don't be afraid to reiterate what you think you've heard, back to them. I often say something like, "I'm hearing that you care about capturing the candid moments more than having a photo where everyone is looking at the camera and smiling, is that right?" Which then gives them the opportunity to either affirm that idea, or to tell me that they do really love candid photos, but would like one with everyone looking and smiling as well. Either way, I'm given the opportunity to understand my client's hopes and expectations a bit better, which makes it easier for me to give them a session that they will really love and treasure for years to come.


Do you hold consultations prior to your sessions?


Are there any questions that are on your must-ask list?


The post Portrait Consultations: Two Questions That Make A Big Difference by Meredith Clark appeared first on Digital Photography School.