Thursday, July 31, 2014

Landscape Photography – Duotone


Just a real quick post while I plan my next trip to the Angelina National Forest near Lufkin, Texas.


If you're a Photoshop user and haven't purchased Scott Kelby's latest "Photoshop CS4 Book for Digital Photographers" yet, don't wait another minute. Yes, I'm a definite fanboy of Scott's books, Kelby Training and NAPP. I hate technical books and really hate some author talking down to me in his book just because I was born in a "pre-computer" era. Scott writes all of his books just like his training videos; as if he's your friend showing you something cool he's just discovered in CS4. He never talks down to you or makes you feel stupid because you haven't memorized every keyboard shortcut in the world. He explains Photoshop logically, one step at a time and never assumes you've been doing this for ten years. His style is competent and comfortable, and for a computer book author, it's a rare treat.


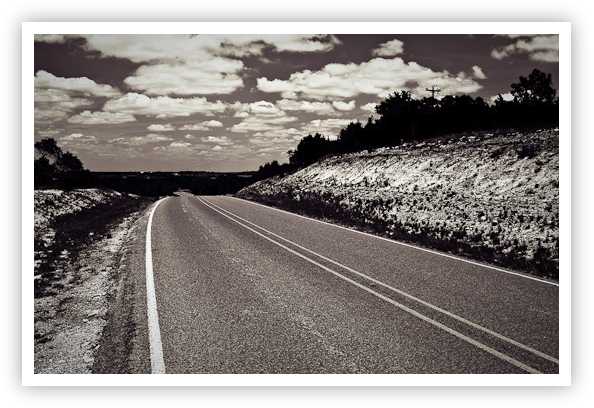
The Road is Long (Duotone)


The Road is Long in Duotone - Johnson City, Texas
Copyright 2009 Jeff Lynch Photography
Shot taken with a Canon EOS 40D set on aperture priority (Av) using an EF 24-105mm f/4 L IS USM hand-held. The exposure was taken at 24mm, f/11 for 1/125th of a second at ISO 100 on Sandisk digital film. Post capture processing was done in Lightroom 2 and in Photoshop CS4 as a duotone. Click on the image above for a larger version.


Scott's "Photoshop CS4 Book for Digital Photographers" book has a cool section called "Quadtoning for Richer B&Ws" and it's a wonderful technique for adding that something extra to your black and white images. Photoshop CS4 makes this technique a real snap and I finished the image above in about ten seconds using one of the 137 built-in presets.


Very, very cool!


Posted in Photography Tagged: Canon, Canon 40D, Kelby Training, NAPP, Photoshop CS4, Scott Kelby


Landscape Photography – Looking Upstream


Oops! Quick change of plans. I'm heading for the Angelina National Forest late this afternoon (about 150 mile drive from Sugar Land) and I'll be up before dawn to catch the sunrise over Boykin Springs. This time of year the early morning light is much warmer and softer, especially in the East Texas Piney Woods.


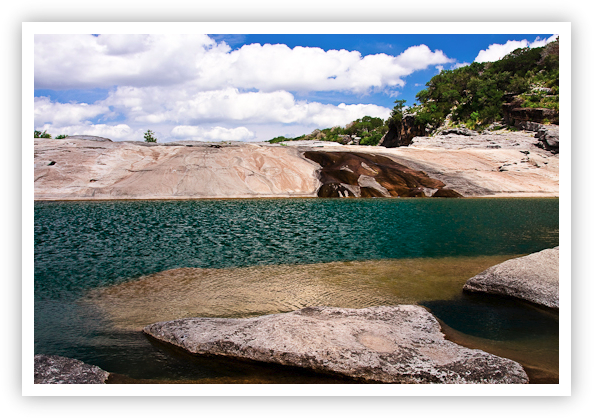
Here is another image of rocks, trees and water taken while looking upstream at the Pedernales Falls State Park near Johnson City, Texas (birth place of President Lyndon B. Johnson). I'll be visiting this wonderful park once again late next week to (hopefully) capture some beautiful sunrise and sunset shots. We've had a little rain lately so I'm hoping for better waterfall shots as well.


By the way, the difference in exposure between the foreground (rocks & water) and the background (sky & clouds) in this image was almost 5 stops. Rather than bracket my exposures to create an HDR image I decided to use a 3-Stop/Soft rectangular Singh-Ray Graduated Neutral Density Filter held in place in front of the lens using a Cokin "P" Series Filter Holder.


In my opinion, no Photomatix Pro, Lightroom or Photoshop technique is as simple and as foolproof as using an ND-Grad for this common landscape situation. Don't take my word for it, read what landscape professional Steve Kossack has to say on the subject of "using graduated neutral density filters".


Looking Upstream


Looking Upstream at Pedernales Falls State Park - Johnson City, Texas
Copyright 2009 Jeff Lynch Photography
Shot taken with a Canon EOS 40D set on aperture priority (Av) using an EF 24-105mm f/4 L IS USM tripod-mounted. The exposure was taken at 24mm, f/9 for 1/100th of a second at ISO 100 on Sandisk digital film. Post capture processing was done in Lightroom 2. Click on the image above for a larger version.

You can also find a 1200 x 800 version of this image and many others on my Flickr site.


Posted in Photography Tagged: Canon, Canon 40D, Landscape Photography, Pedernales Falls State Park, Texas Landscapes


Wednesday, July 30, 2014

Nature Photography – Swirl


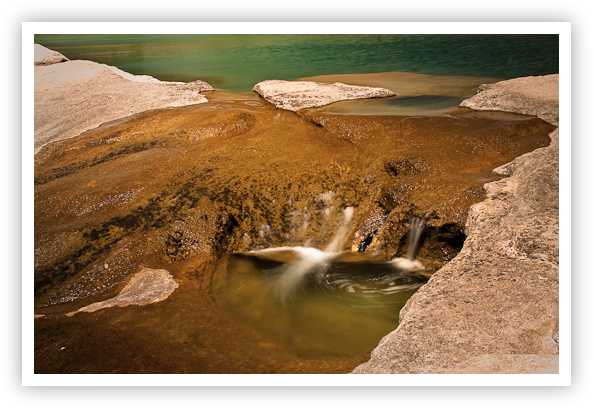
Just a quick (prescheduled since I'm out shooting) post with an image I took a few weeks ago and couldn't decide what to do with. I love the color of the water and the rocks and the way the water swirled in the little pool. I'm just not sure what story this image tells, if any.


So here's the thing. You get to tell the story in the comments while I'm out in the blazing heat and awful humidity of the East Texas Piney Woods. I know you're out there lurking Mark, Ray, Jaime, Michael & Terry. Tell me why this shot works or why it doesn't. Tell me what you "feel" when you look at it. (sidebar: a little alcohol helps). Let me have it with both barrels!


And have a great weekend!


Swirl


Swirl - Pedernales Falls State Park, Texas
Copyright 2009 Jeff Lynch Photography
Shot taken with a Canon EOS 40D set on aperture priority (Av) using an EF 24-105mm f/4 L IS USM tripod-mounted. The exposure was taken at 28mm, f/16 for 1.6 seconds using a Singh-Ray Vari-ND neutral density filter. Shot at ISO 100 on Sandisk digital film and post capture processed in Lightroom 2. Click on the image above for a larger version.

You can also find a 1200 x 800 version of this image and many others on my Flickr site.


Posted in Photography Tagged: Canon, Canon 40D, Nature Photography, Pedernales Falls State Park


Landscape Photography – Reflections in Black & White


Thanks everyone for those great comments on Saturday's post. I appreciate all my friends taking up the slack while I was out in the heat.


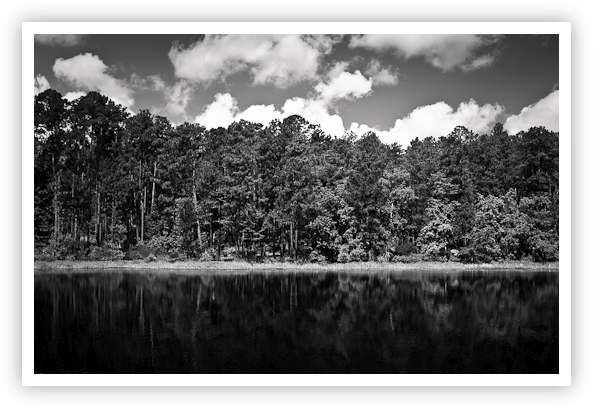
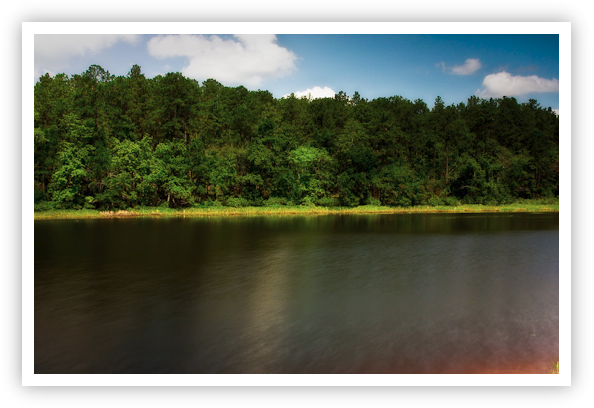
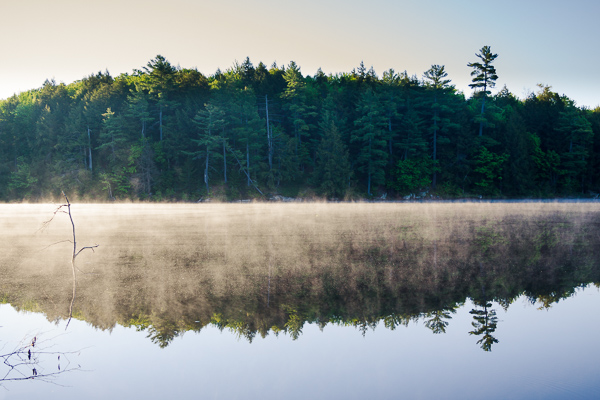
When I wander the back roads of Texas I seldom know exactly what I'm looking for until I see it. I may drive hundreds of miles (as I did in the past few days) in search of some allusive subject or location to photograph. More and more I find myself searching for a subject that speaks to me of peace and quiet, both of which are in short demand these days. This still little spring fed lake in the Angelina National Forest of East Texas fit the bill perfectly!


Reflection in Black & White


Reflection - Angelina National Forest, Texas
Copyright 2009 Jeff Lynch Photography
Shot taken with a Canon EOS 40D set on aperture priority (Av) using an EF 24-105mm f/4 L IS USM tripod-mounted. The exposure was taken at 25mm, f/16 for 1/15th of a second using a Singh-Ray 3-Stop/Soft graduated neutral density filter. Shot at ISO 100 on Sandisk digital film and post capture processed in Lightroom 2 and Photoshop CS4. Click on the image above for a larger version.


Posted in Photography Tagged: Angelina National Forest, Canon, Canon 40D, Landscape Photography


Tuesday, July 29, 2014

Landscape Photography – Curves


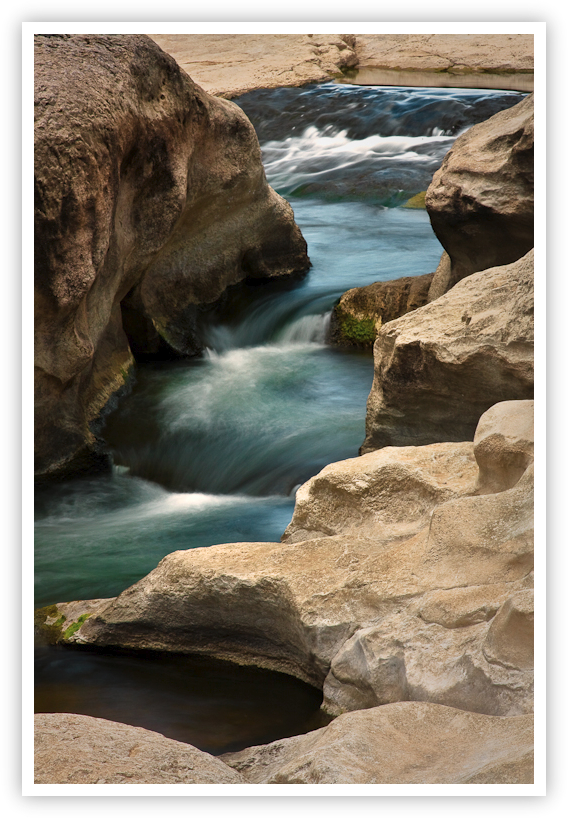
Here is another image taken last month at the Pedernales Falls State Park near Johnson City, Texas. I'm heading back to the Texas Hill Country later this week for a few days of landscape and nature photography. It's going to be hot with the daily highs hovering around 102F, so I'll probably stick to shooting during the "golden hours" during sunrise and sunset.


Curves


Curves - Pedernales Falls State Park, Texas
Copyright 2009 Jeff Lynch Photography
Shot taken with a Canon EOS 40D set on aperture priority (Av) using an EF 24-105mm f/4 L IS USM tripod-mounted. The exposure was taken at 95mm, f/16 for 1.6 seconds using a Singh-Ray Vari-ND neutral density filter. Shot at ISO 100 on Sandisk digital film and post capture processed in Lightroom 2 and Photoshop CS4. Click on the image above for a larger version.


Posted in Photography Tagged: Canon, Canon 40D, Landscape Photography, Pedernales Falls State Park, Texas Landscapes


Landscape Photography – Sam Rayburn Reservoir


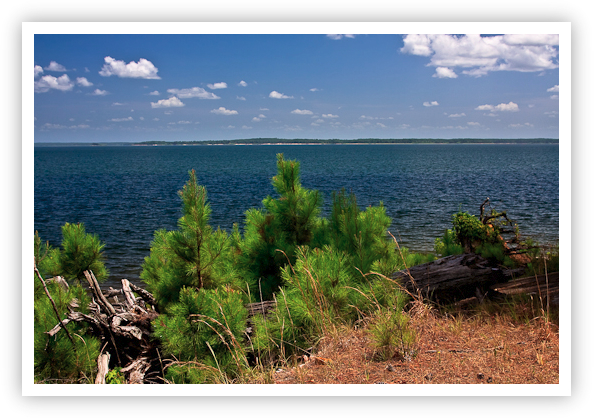
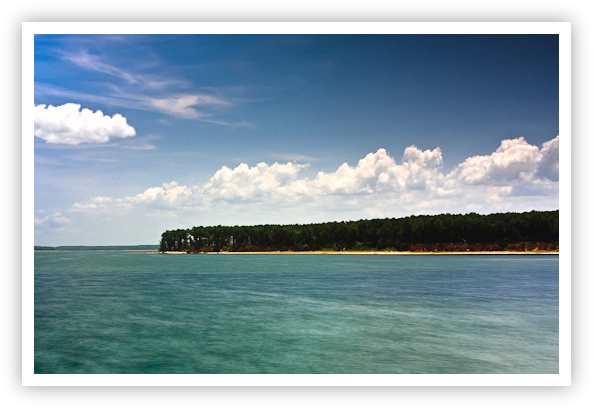
I thought I'd post a Google Map just in case you're wondering exactly where I took these next two images. I realize that these don't look the way folks expect Texas to look but it's real. East Texas is covered in lush pine forests with several beautiful rivers running through the area. It's completely different geology and geography from the areas of central Texas I've previously shown you.


Inland Lake


Sam Rayburn Reservoir - Angelina National Forest, Texas
Copyright 2009 Jeff Lynch Photography
Shot taken with a Canon EOS 40D set on aperture priority (Av) using an EF 24-105mm f/4 L IS USM tripod-mounted. The exposure was taken at 28mm, f/9 for 1/60th of a second at ISO 100 on Sandisk digital film. Post capture processed in Lightroom 2 and Photoshop CS4. Click on the image above for a larger version.


Sam Rayburn Reservoir


Sam Rayburn Reservoir - Angelina National Forest, Texas
Copyright 2009 Jeff Lynch Photography
Shot taken with a Canon EOS 40D set on aperture priority (Av) using an EF 24-105mm f/4 L IS USM tripod-mounted. The exposure was taken at 32mm, f/20 for 6 seconds using a Singh-Ray 3-Stop/Soft graduated neutral density filter. Shot at ISO 100 on Sandisk digital film and post capture processed in Lightroom 2 and Photoshop CS4. Click on the image above for a larger version.


View Larger Map

Google Map of the Angelina National Forest and the Sam Rayburn Reservoir in East Texas.


Posted in Photography Tagged: Angelina National Forest, Canon, Canon 40D, Landscape Photography, Texas Landscapes


Monday, July 28, 2014

Landscape Photography – Boykin Springs


Hey folks! Just a real quick post and update as I head out to the Texas Hill Country for a little commercial and landscape work. I took this image at Boykin Springs in the Angelina National Forest last weekend. It was a pretty windy day and I wanted to see what effect the moving clouds and ripples in the water would have on a long (4 second) exposure.


Poster & Print Update
I expect to have my first three 16 x 24 posters available for sale early next week on the "Prints & Posters" page on this blog. Each poster will be printed on Kodak Professional Supra Endura VC Digital Paper which boasts superb color reproduction and a standard archival value of 100 years in home display and 200 years in dark storage. Most orders will ship in 48 hours. All posters will be shipped flat in a very secure padded cardboard container to protect your poster during transport. To keep things simple there is a flat shipping charge regardless of the number of posters ordered.


If you would like to order a fine art print of any image posted on my blog, please contact me via the "Contact" page on this blog and I'll send you a price list to look over.


Boykin Springs


Boykin Springs - Angelina National Forest, Texas
Copyright 2009 Jeff Lynch Photography
Shot taken with a Canon EOS 40D set on aperture priority (Av) using an EF 24-105mm f/4 L IS USM tripod-mounted. The exposure was taken at 24mm, f/18 for 4 seconds using a Singh-Ray Vari-ND neutral density filter. Shot at ISO 100 on Sandisk digital film and post capture processed in Lightroom 2 and Photoshop CS4. Click on the image above for a larger version.


Posted in Photography Tagged: Angelina National Forest, Canon, Canon 40D, Landscape Photography, Texas Landscapes


No Post Friday!


Hey folks! No daily post today since I'm out traveling to central Texas for some landscape and commercial work. Enjoy the Worldwide PhotoWalk on Saturday! I'll be there in spirit if not in the flesh.


Have a great weekend.


Jeff


Posted in Photography


Sunday, July 27, 2014

Overcoming the Fear – Creating Better Travel Photography Portraits


Pick up Oded's new Snapn Guide (a dPS sister company) Snapn Travel here for only $7. A lifetime of travel memories in a Snap. Traveling is fun and rewarding, but sharing memories of your journeys with friends, family and the world through your own beautiful images can be even better. Especially rewarding are images of the interesting people you meet along the way, because creating travel photography portraits can be an amazing addition to your portfolio. But, if taking pictures of strangers while interacting with them makes you uneasy, maybe even feeling a bit of fear? GOOD! Then this article is for you.
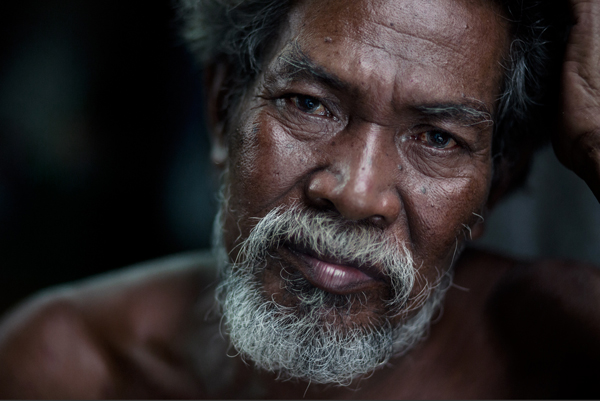

The world of photography is divided between two groups of people: those who enjoy creating portrait photography and those who do not. Through discussion with my own students I have realized that only about ten percent of those who avoid portrait photography actually do not like it. The remaining ninety percent, so I discovered, are hiding, deep down inside, a photographer who really desires to shoot portraits, especially when he or she travels to interesting and distant places, meeting people from other cultures. But it is not that easy. Let's be honest, sometimes it's super hard. So what we do is we wrap ourselves with excuses like: "I do not feel comfortable with this","I do not want to invade a person's privacy" and as the "golden excuse" we used that one story of someone who shouted at us at some market in Morocco.
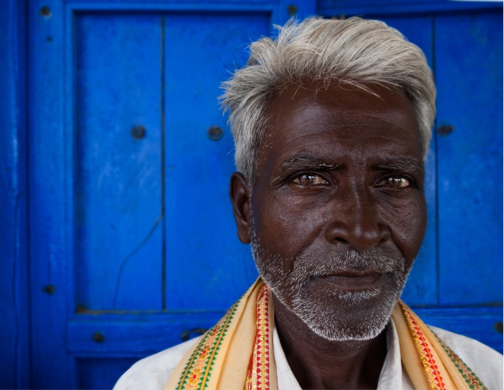
Blue guy


First, from my experience, getting yelled at (and all kinds of other problems) only starts when you take photos of someone from a distance and they catch you in the act.
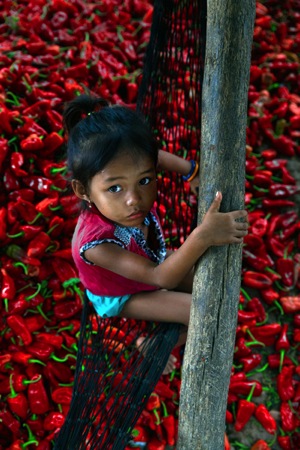
Paprlika prince


But here is another fact: there is nothing like photographing someone from a close distance. The eyes, the feelings and the huge visual story potential within. Besides, when we work from a close distance while interacting with the person, we gain control of our tools as photographers: composition, background, the "decisive moment" and we also have that amazing ability to tell the photographed person: "you know what, let's take one more shot". In 99% of my travel photography work with magazines, I photograph portraits from a close distance, without hiding myself or hiding the fact I am taking a photo. Now, some will say that when a person sees a camera, it affects the authenticity of the moment. I will address this issue later.


First rule: tell, do not just show


This is the # 1 mistake of bad travel photography: trying to show a story, instead of telling it. Creating a diary instead of evoking feelings. Here is the unpleasant truth; apart from our family and close friends, no one cares where we travel and who we meet along the way. If you want to succeed in exciting your viewers, you need turn to a different approach.


Before the digital era, it was enough if you traveled to the other side of the world and came back with images of people from some exotic tribe. You know, those "colorful" images, of people with a bone stuck in their nose. Today, when almost every corner of our planet has been photographed, this is not enough anymore and we have to return to the basics; to that one element that hasn't changed since the beginning of time - a story. We are just obsessed with stories. A person is not only clothes, a Cuban cigar or colorful sari; a person is an entire story. A story is a complex thing to create, so for the first step I will ask that your images be able to answer this question: how does the person in the image feel? Is it a comedy or a tragedy? Has he just finished a day of hard work or is he enjoying a vacation? Look at the person's body language and listen to his voice. Try to convey the type of feeling you had while meeting this person.


Choose the right equipment


Remember the following equation - if you have a telephoto lens, you will to use it, because that is the easiest way of shooting people, from a distance. Instead, go with a wide lens (up to 50 mm for full frame, 35mm for cropped sensor). Also, try to avoid complicated and sophisticated equipment like flash and tripods. This will attract unwanted attention in the streets and you will be busy handling the gear instead of focusing on the story in front of you.


Read about the culture


Yes, in India they wear sari and in Cuba they smoke cigars. To get a more in-depth story of the culture, you have to learn about it first. Prior to your trip, do a brief study of the place you are about to visit. View images, read material and mainly, answer important questions like:


  • How will people react to the camera?
  • Do I need to pay for taking a picture?
  • Are there things that I should not photograph?

In order to answer these questions you can ask someone who visited the destination or look for information on the web. If you do not know anything about the culture, you will fall into the cliche of photogenic tourist traps. But if you come with knowledge, it will affect your photography. My editor at the National Geographic Traveler magazine calls this "photographic intelligence". Go the extra mile and read about the history of the place, the religious system, the food and the local music, which leads me to our next tip.
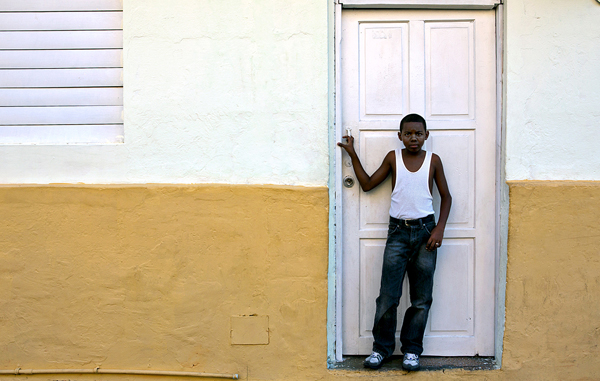


Use the local music to your advantage


Recently I photographed a story on the Dominican Republic. It was the first time I worked on this side of the world and suddenly I felt as if I almost forgot how to take pictures. I did not approach anyone and at first, my photography did not come out well at all. So, I just listened to some local music on my headphones. I do not recommend staying with headphones all the time, because it cuts you off from the environment. But for the first day, it's a great tip; it puts you in the groove and makes you feel good. In conclusion, on the first day of your trip, do not trouble yourself with approaching strangers. Relax, listen to the local music, get into the groove and warm up with easier image making: buildings, landscape, food, etc.


Get outside when the lighting is right


The meaning of "Photography" is drawing with light. Even the most photogenic person will not look good in unsuitable light. There are no rules about lighting, no "good" or "bad". There is appropriate and inappropriate lighting, because light has varying qualities: color, direction, strength, softness, etc. According to most photographers, the best light for most situations is within the "golden hours": around sunrise and sunset. If this is your first time approaching people in order to photograph them, let the light be on your side. Try adjusting the correct time to go outside. If you cannot control the time (like when on an organized tour) try to photograph people in the shade.


Force yourself - get out of your comfort zone


After a day of listening to the local music, getting the groove and warming up with easy shots, it is time to start working. Do not delay it, even if it is very hard for you. Just fake it until you make it:


  1. Choose: choose a person you would like to photograph. Don't use excuses like: "I can't find anyone special". Just make the shot, even if it's only for practice. It is very important that you choose a person who is not on the move, because you need to get ready BEFORE approaching him, so it will be easier in a static situation (a seller in market stand, or someone relaxing at the park)
  2. Get ready: know your lens and exposure. Think about the composition and background.
  3. Approach: ask the person if you can take their photo. You can ask verbally or just by lifting the camera and smiling, waiting for a smile back.
  4. Explain: it doesn't matter if you are in NYC or Tibet; people want to know why you are taking their photo. You can tell them how much you liked their shop, pet, hair, etc., or just mention that you like portrait photography and you would like to take their photo. Usually this kind of good feedback will be enough.

Now, you might get a NO for an answer. That's okay! Say "thank you" and then just "get back on the horse", move on to the next person. You might get a YES. That's wonderful! Relax, think about the framing and make the image.
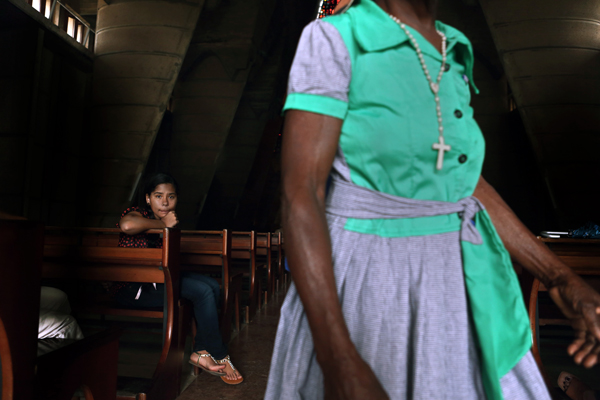


So what about the authenticity of the moment?


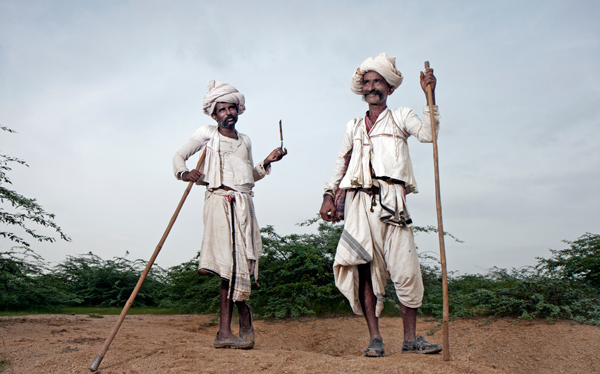
It's True. Usually when a person is asked to be photographed, they will put on a "mask". You can call it their pose. Sometimes this pose might be the thing you are looking for. When photographing two men for a story I did in India for the National Geographic Traveler magazine, that pose (image below), which is so typical for the Rabari tribe men, was perfect for the story I wanted to tell.

If you don't want the pose, my solution - give your subject time and space. Do not stop him or her from making that pose. Give them a positive feedback and show them how nice the first photo came out. From my experience, after a minute or two, the masks fall. That is because someone eventually will enter your subject's shop, or they will receive a phone call or anything that might make your subject forget you are still there. This is the moment of magic. This is when the best pictures happen.


Pick up Oded's new Snapn Guide (a dPS sister company) Snapn Travel here for only $7. A lifetime of travel memories in a Snap


  • Learn how to bring the emotion of your trip home with you, not just a memory card.
  • Become a travel photographer instead of a photographing traveller.


The post Overcoming the Fear - Creating Better Travel Photography Portraits by Oded Wagenstein appeared first on Digital Photography School.

Taking your DSLR into the Backcountry Safely


In the Northern Hemisphere summer is finally here and that means it's the beginning of camping season. It's time to haul out the tent, the propane stove, the canoe, the bug hat and the DSLR. You visit all these beautiful places, gain a sense of peace and respect for Mother Nature, then come home and wish you were still there. Having beautiful, sharp images of the brutal trail you faced, the noisy bird that woke you at dawn, or the incredible sunset you experienced can make the experience all the more rich. The added bonus is you have some fantastic images you can hang on the wall and gaze at as you plan your next trip.


Back country photography5


Taking a DSLR into the back country isn't as costly or as expensive as you would think. You don't need the super high end gear. Your DSLR is fairly rugged, it can handle rain, heat, a few bumps, water, dust, campfire smoke, etc. It's not as breakable as you might think. Whether you are hiking or canoeing/kayaking, taking your gear into backcountry is easy. I've been taking my DSLR into the backwoods of Northern Ontario for years and have never regretted the decision. It's taken practice, but through trial and error, you too can find a system that lets you take your DSLR into the woods. When packing for a backcountry trip remember to consider the following.


How will you pack and protect your gear but make it easily accessible?

OPTION 1: A hard case


These are easy to access, and when closed properly are airtight. Your camera and lenses will be completely safe using this method. They are easy to access on the trail, just lift the lid. Hard cases can be adapted to fit a camera and a lens by removing some of the foam padding from within. You customize the case to your gear. The drawback is the added weight you will have to lug and the cases are awkward. Picture yourself dragging a tired body, a backpack containing a tent, food, clothing and a suitcase like object through the bush. It's not easy. But if you want the 100% protected guarantee then this type of case is for you.


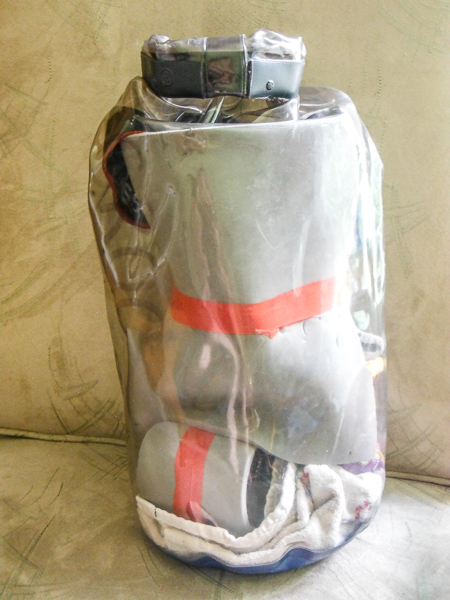
OPTION 2: A dry bag


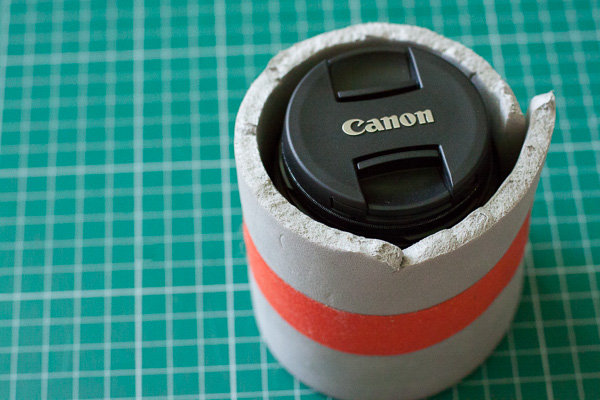
This method doesn't guarantee complete protection. If you capsize in a canoe or drop the gear into a river, dry bags don't promise watertight protection. However, a dry bag is easy to strap to the canoe or kayak and can be packed into a standard tripping pack quite easily. The dry bag keeps it safe from the elements. The handle at the top makes it easy to carry. The trick is to create a padding system within the dry bag. I use an old foam mattress to pad my gear.


Back country photography1


Back country photography7


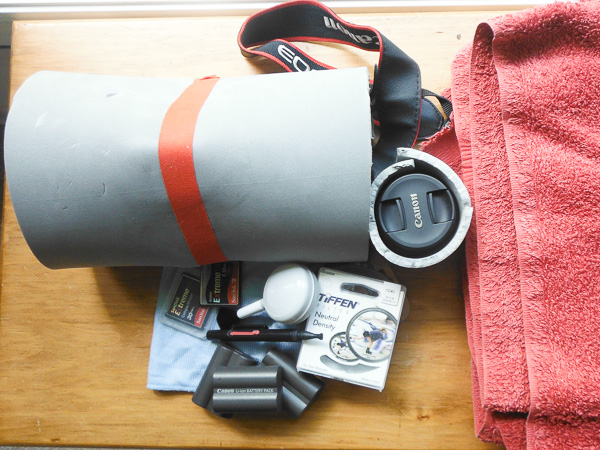
Basically, cut up the mattress to fit your camera and bag. You can wrap spare lenses in the same foam and place them in the bottom of the bag. Dry bags can be purchased in varying sizes so you don't have to buy a new bag for each combination of gear. This method is the cheapest, it's fairly accessible and it's certainly the easiest to carry.


OPTION 3: A tripping pack designed for carrying camera gear


There are several tripping packs that are designed to carry your tent, clothes, food and camera gear. These are excellent at protecting your gear and are designed for just such an outing. The problem is they aren't very waterproof. They do come with a rain cover, but let's face it, the gear is ruined if you drop the bag in a lake. If you are just hiking, then this is a fantastic option, these bags are designed for this job.


The drawbacks come for those of us who are smaller in stature or female. Most of the overnight backpacking bags are huge and become difficult to carry, especially for women. Sometimes chest straps don't sit where they should and can be very uncomfortable. Comfort on the trail is extremely important: you don't want to be in agony. Whatever you choose, make sure the pack fits properly. The comfort factor is the key to an enjoyable hiking trip.


How far will you travel? Can you really carry all that gear?


Tripping in the back country is hard work. You have to carry everything you need. You want to make sure enjoy your trip. If you are crippled under the weight of carrying, or portaging your camera gear, it isn't going to be fun. Pack light and smart. Try to limit yourself to a few lenses, a filter or two, a few batteries and memory cards.


Back country photography6


Make it a fun challenge, take along one lens. Do you really need your 85mm lens if your 70-200 range zoom will cover this focal length? Be frugal with what you carry. This will push you to be creative in the types of shots you take. Also, it's important to take a tripod for super sharp shots. Investing in a lightweight model is a good idea. The lightweight versions are pricier but worth it.


Use Common Sense


If you are going on a trip and serious about taking some great photos then make sure you plan for it.


  1. Cut down the number of kilometres (miles) you cover in a day in order to build in some time for photography.
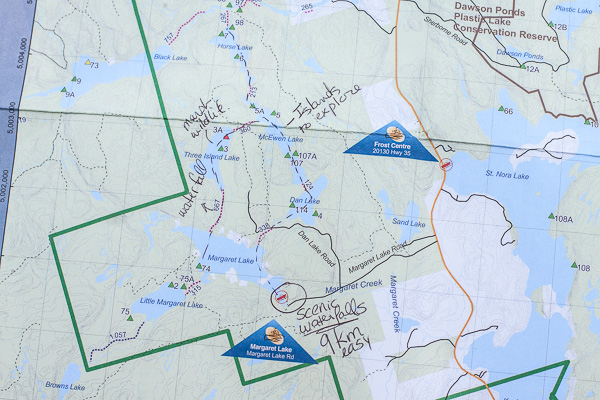
  2. Choose a route that has some beautiful photographic locations. Plan in advance and do your homework.

    Back country photography2


  3. If canoeing or kayaking plan a route that doesn't contain huge multi-kilometre portages that will drain you of energy.
  4. Make sure you tie your camera gear to your canoe/kayak for added safety in the event you dump.
  5. Portage through challenging rapids to avoid soaking gear.
  6. If the weather is challenging, stay undercover. You can get moving tomorrow.
  7. Don't take your gear out of its protective bag if the water is really rough, especially if you're a novice paddler.

    Back country photography4


Finally, there's one essential piece of gear that weighs almost nothing but you are guaranteed to regret it if you don't take it. Always take a lens pen, and a couple of microfiber cloths, they are a must. Your gear will get dirty. Accept this fact now and simply remember to book your camera in for a thorough cleaning after you return. It will feel like a new camera afterwards, that's a bonus.


It's a little more work but it will be worth it. People will "oooh" and "ahhhh" at your photos, and who knows maybe you will inspire a friend to take same trip because they just have to visit the place they've seen in your photographs.

Back country photography3


The post Taking your DSLR into the Backcountry Safely by Erin Fitzgibbon appeared first on Digital Photography School.


Saturday, July 26, 2014

Landscape Photography – Sunset on the Rocks


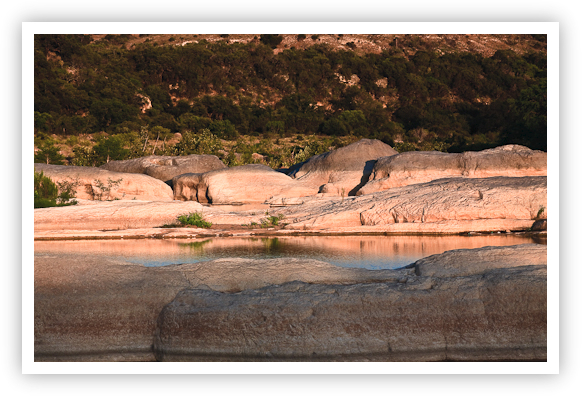
I had a great time photographing the sunset at the Pedernales Falls State Park near Johnson City, Texas on Friday evening. I arrived about an hour before sunset and had plenty of time to hike the falls and find a good spot or two. Unfortunately, the drought in central Texas continues and there was very little water flow running between the huge granite boulders and rock shelves. Only a few still pools of water to catch the sun's final rays and provide me with a nice reflection to capture. When the water level is this low you can see millions of years of sedimentation in the granite. It's humbling to sit there and imagine the water flow that it took to carve these rocks into their unique shapes.


Sunset on the Rocks


Sunset on the Rocks- Johnson City, Texas
Copyright 2009 Jeff Lynch Photography
Shot taken with a Canon EOS 50D set on aperture priority (Av) using an EF 24-105mm f/4 L IS USM tripod-mounted. The exposure was taken at 73mm, f/13 for 1/13th of a second at ISO 100 on Lexar digital film and post capture processed in Lightroom 2 and Photoshop CS4. Click on the image above for a larger version.


Posted in Photography Tagged: Canon, Canon 50D, Landscape Photography, Pedernales Falls State Park


Prints & Posters


Posters and Prints


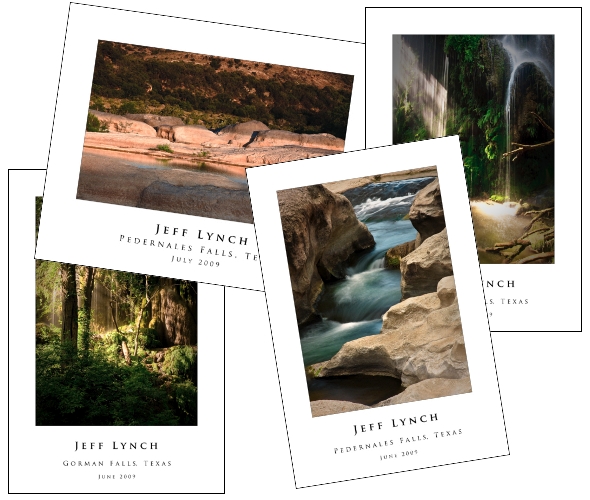
It took me a while to figure all this PayPal stuff out but I now have posters and prints available for sale on this blog!


Each poster will be printed on Kodak Professional Supra Endura VC Digital Paper which boasts superb color reproduction and a standard archival value of 100 years in home display and 200 years in dark storage. Most orders will ship in 48 hours. All posters will be shipped flat in a very secure padded cardboard container to protect your poster during transport. To keep things simple there is a flat shipping charge regardless of the number of posters ordered.


If you would like to order a fine art print or poster of any image posted on my blog, please contact me via the "Contact" page on this blog and I'll send you a price list to look over.


Thanks for all your support!


Jeff


Posted in Photography Tagged: Posters and Prints