Over the past few years I have learned a great deal about doing portraits, especially of young kids. I think it's because I get so much enjoyment out of these types of shoots that I end up doing them more, though at some point it hardly seems fair because I wonder if I'm having more fun than the children whose pictures I am taking.
While each session is unique, I have developed my own style (which, in many ways, will always be a work in progress as I continue to learn new things) when it comes to both the shooting and editing process, and I thought it might help those who are new to this type of photo session to see a few examples along with an explanation of the creative choices I made along the way. I do all my edits in Lightroom, and while I sometimes need to do some more in-depth adjustments in Photoshop, 98% of all the pictures I give to clients don't need anything more than what Lightroom can do. If you don't have this software, I highly recommend it!
Get it in camera first
Before I get to the editing portion of this piece, I need to clarify one thing: no amount of editing can make up for initial on-location mistakes, which is why it's so critical to get the initial picture as good as you can right from the beginning. This involves things like choosing a good place to take the photos, finding the right time of day, and communicating with your subjects (and their parents, if you are working with kids). Along with that are your own creative choices such as your aperture and focal length, the composition of your shot, the angle from which you choose to shoot, the lighting manipulation you use, and a host of other elements that have an enormous impact on the final outcome of any given photo session.
Of course if you work in a studio you have much greater control over some of these items, but at the end of the day a poorly-shot initial photo will remain exactly that, no matter how much you try to edit it in Lightroom or Photoshop. I say all this to make sure you understand that editing tools are not a magical cure-all to make all your pictures shine. And the best way to make sure your photos are as good as they can be from the beginning is to focus not on the editing, but on basics like exposure, lighting, framing, and composition. It also helps to shoot in RAW, not JPEG, in order to maximize the amount of data you can work with on each individual photograph.
Basic portrait processing in Lightroom
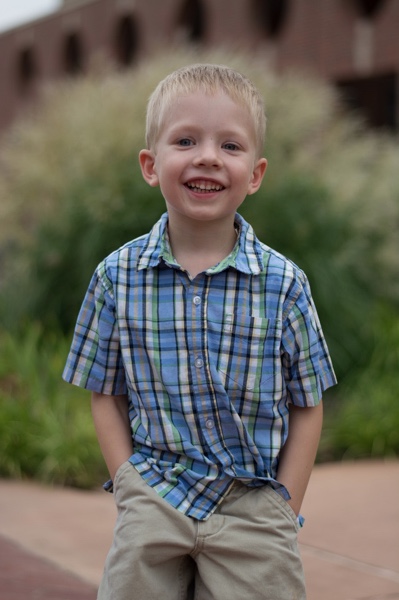
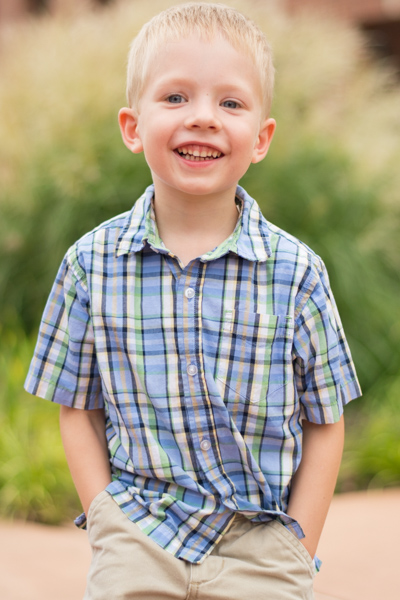
I shot this picture with my Nikon D7100 at 50mm, f/1.8, ISO 200. Since the sun was setting and I was not working with off-camera strobes, my lighting options were a bit limited. I had his father stand behind me with my Neewer 43-inch reflector to capture a bit more of the available light. (If you don't have one of these, I recommend getting one. They are quite cheap and a fantastic addition to any camera setup.)
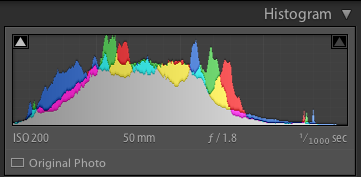
The initial photo was a bit underexposed, as shown in the histogram as well.
I also chose to frame the child with the green bush in the background, and of the half-dozen images I got of this particular pose I liked this one in which he was not quite looking at the camera. Often when working with kids I have found that the best images are a bit more candid as opposed to posed, but again, this is a creative choice you will have to make for yourself. Finally, I made sure to shoot this in RAW to take advantage of as much data as possible in order to correct some things back at my computer. Right away you probably noticed that the image is a bit too dark, which was the first thing I fixed in Lightroom.
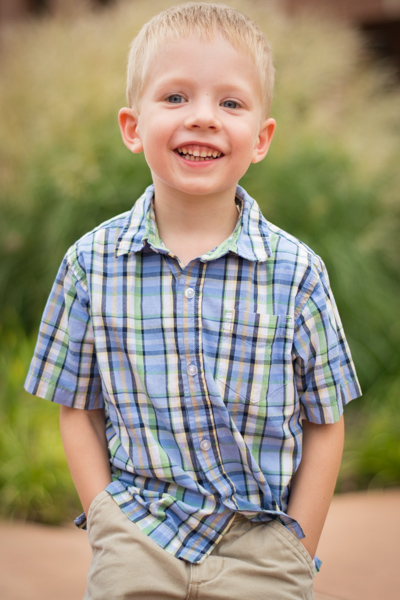
A quick look at the histogram showed me that overall I got things pretty good in camera, but to make it look a bit better I increased the exposure by 1.2 stops, as well as cropped it a bit to focus the viewer's attention on the boy's face without the distracting red building in the background.
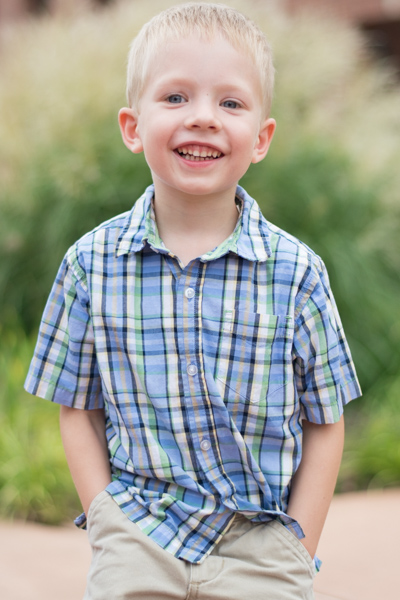
First edits: Cropped and increased the exposure by 1.2 stops.
So far so good, but there's still a lot of work that needs to be done. While the overall brightness was better, the colorization was still a bit off. The initial white balance settings determined by my camera were 4900K and -9 tint, but I wanted something a bit warmer so I increased the temperature to 5700K and changed the tint to -7.

Second edits: adjust white balance and tint.
I liked this much better, but there were still some things that needed fixing. Now that the overall photo was properly exposed, there were some parts that were a bit too bright which was handled by lowering the highlights slider by -19. After that I increased the saturation to +6 and added +4 contrast as well.
Third edits: lower highlights, increase saturation and contrast.
I was much happier with this, but it's important to remember that all of the changes you make to a photo in post-production are based on your own creative ideas and there is no right or wrong way to do things. Some people like images that are desaturated, some prefer selective coloring (i.e. one part is colorized or over-saturated while the rest of the image is more black-and-white), others use cropping to achieve different effects. The sky really is the limit. One thing I like to do from time to time is add a subtle vignette effect (using Post Crop Vignette at -26, Highlight Priority), which I did here to result in the final image I gave to the client.
Final edits: add a bit of an edge vignette, other minor color adjustments.
You might look at this and think the colorization is a bit off, or the vignette should be stronger, or the entire framing should be different, but the beautiful part of photography is that we all have our own opinions on how to do things. I was happy and so were my clients, which is all that matters to me.
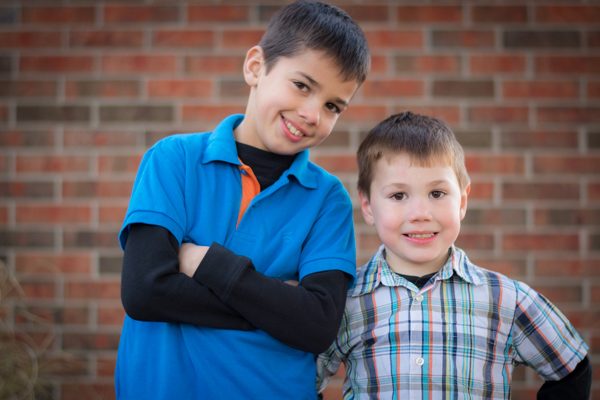
In this photo I used the Brush tool to selectively desaturate the orange strip on the boy's shirt, and the Radial Filter to add a more precise vignette.
I do think it's important to maintain a sense of reality in photos, though, and not let the editing get out of hand. It's easy to feel like an all-powerful genie when you start playing around with the tools in Lightroom, Photoshop, or other editing software, but my rule of thumb when editing is to try to make the final image represent what I saw, when I initially took the photo. In the above image, for example, the orange strip on the boy's shirt was a bit distracting, so I was able to selectively desaturate it quite a bit with Lightroom's Adjustment Brush tool. This, along with other edits similar to the ones described above, resulted in a photo that my client was quite pleased with.
My point is that it's great to have these editing tools available but If I start to lean too heavily on the saturation, bump up the clarity to absurd levels, or making dozens of small changes with the brush tool, I usually end up with photos that bear little resemblance to the original and come across as emotionless and empty.
What about you? What style have you developed over the years, and what approach do you use when you sit down to edit? Post your thoughts in the comments section below.
The post Basic Portrait Processing in Lightroom by Simon Ringsmuth appeared first on Digital Photography School.


