Masking is one of those techniques that will change the way you use Photoshop. Understanding this technique can help you to jump from being a beginner level Photoshop user, to a more advanced one. In this article, I will explain how masking really works in Photoshop, its few key concepts, and how Masking helps you to perform non-destructive editing.
The skills you need to get started masking in Photoshop are being able to use the brush tool to paint color, understand two colors black and white, and knowledge of how layers work in Photoshop, which I assume you have very sound knowledge on.
What is masking what does it do in Photoshop?
If you can relate the word masking with the mask, it may make some sense. Why do we use a mask, to cover the face, right? So why would we use masking on a layer, to cover or uncover the content of any layer. With a mask you can control the transparency of a layer. But that is what opacity and fill is for, right? Yes, opacity and fill do control the transparency, but it works for whole layer. What if you would like to have only the right part to be transparent and the left part to be completely visible? That's when masking comes into play.
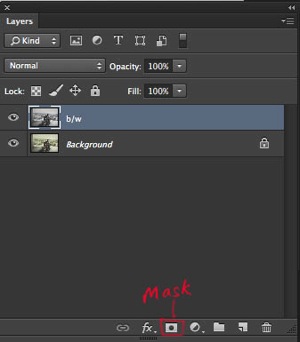
Masking works in two ways. First, you simply add a mask on any layer by clicking the third option on the bottom of layer palette. The other way is by using adjustment layers, which always comes with a mask.
This image shows a layer with no mask applied. I have highlighted the third option on the layer palette. That is where you add a mask. |
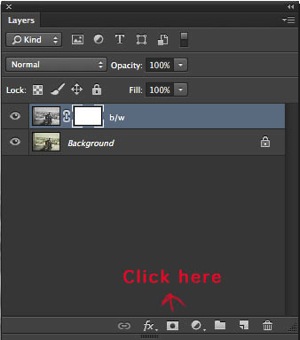
Clicking on the mask option will create a white layer mask on the layer selected. |
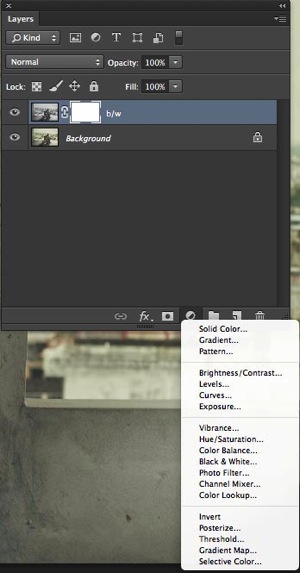
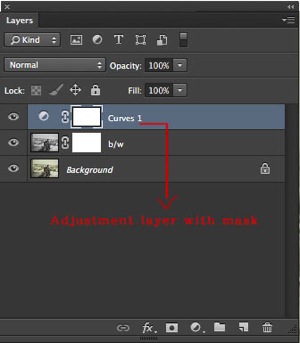
This image shows an adjustment layer. They help you to perform non-destructive editing, and every adjustment layer created this way, comes with a white mask. |
This shows that a new curve adjustment layer has been applied with the white mask. |
While working with masking please remember that white shows the content where as black hides. If your mask is white, the mask is transparent and the layer is fully revealed, whereas if the mask is black it is opaque and the layer below will show through. Below are a few examples that will help you to understand masking better.
A handy saying to help you remember: white reveals, black conceals
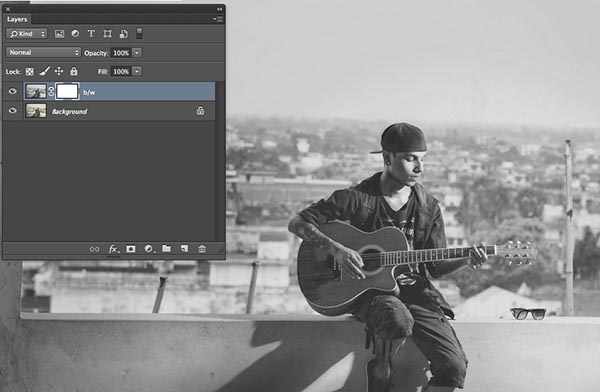
The image above shows, that the white mask reveals the content of the layer it is affecting. I duplicated the background layer and desaturated it with Shift+Command+U on a Mac (Shift+Control+U on PC).
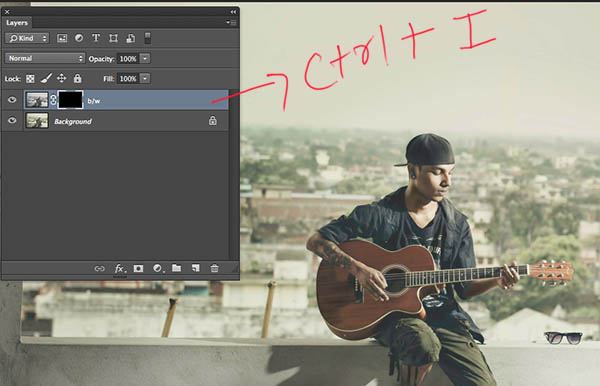
With Ctrl/Cmd+I, you can invert the white mask into a black one. Since black hides the effects, the image has now been changed from back and white to color, from its original state (the layer below is now visible)
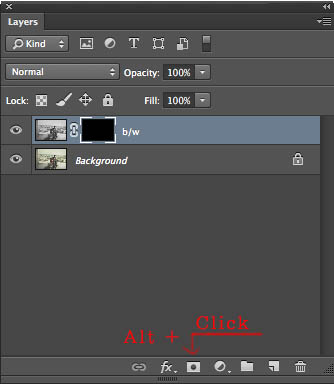
When you first add a mask it will initially be white, but you can change it into black either by inverting the mask, Cmd/Ctrl+I, or you can fill with black or white. Alternately, by simply pressing Alt while clicking to create the mask would also result in a black mask.
Additional tip
- Step 1. First click D on your keyboard (default), which will fill your background color with white, and foreground color with black.
- Step 2 Select the mask
- Step 3 Press ALT+Backspace to fill with the foreground color (black) and Ctrl+Backspace for to fill with the background colour (white). You can use X to swap the foreground and background colors.
You can now paint on the mask with the brush key selected. Make sure your foreground color is opposite to the color of the mask. If you are painting with black on a white mask, the content of that part of layer is becoming transparent while the white parts remain as is. If you are painting white over a black mask, then that part would be back to its original form. You can play around with the percentage of fill and opacity to get more control over your workflow.
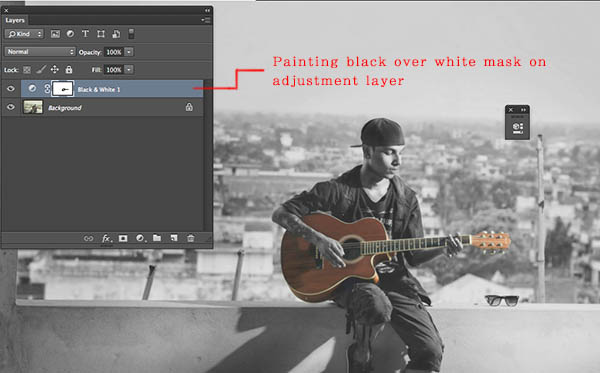
Here I painted the guitar with a black brush over the white mask, resulting in the visibility of color from the layer below.
Additional tip
Simply press your number on the number pad and your opacity will change as per. If you press shift plus the number, then its fill will change.
- 4=40%
- 4+9= 49%
- 0+4 = 4 %
Do you have any other masking tips and tricks? Please share in the comments below if you do, or if you have any questions.
The post Understanding Masking in Photoshop by Anup Ghimire appeared first on Digital Photography School.
No comments:
Post a Comment