
Topaz Simplify is designed in a way that allows you to transform your photography into something that resembles painted or drawn art. There are a ton of different styles of art packed into Simplify, from line and ink, to oil and watercolor painting; so it should provide some great creative opportunities for you. Today I'm only going to do a basic walk through on a couple of different photographs in order to introduce the product to you.
Before getting started I do want to mention that while I'll be using Topaz Simplify as a Lightroom plugin today, it also works with Photoshop, Aperture, iPhoto and others so you don't have to have Lightroom to use it. Find out all the info and get the free trial of Topaz Simplify here.
Topaz Simplify Basic Walkthrough
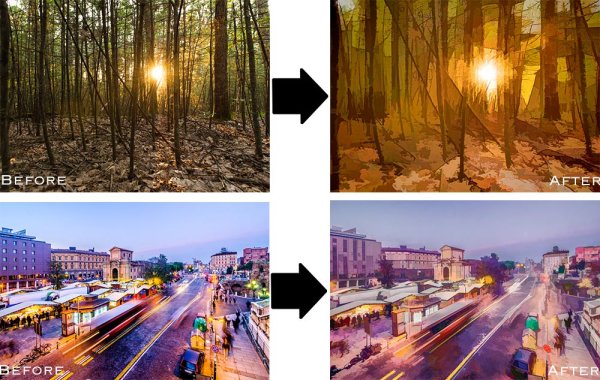
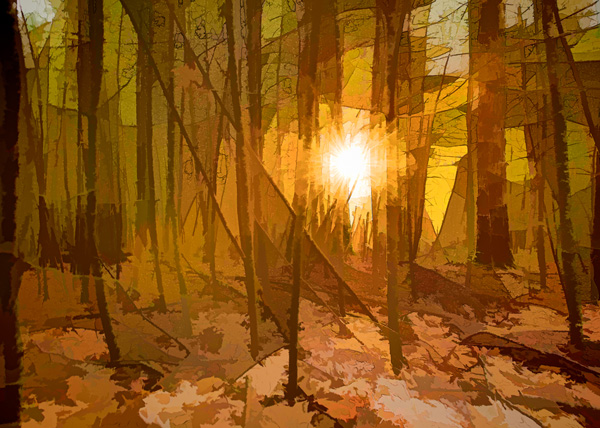
As you can see from the original RAW file below this photograph is in some serious need of help. It's basically just an underexposed shot of the sun setting through the forest, without much of a focal point or anything interesting going on. Now I don't want you to think that Simplify will solve all your terrible miss-fired shots, in most cases it won't. But here I think it does a remarkable job at making lemonade out of lemons.
Do Lightroom basic adjustments first
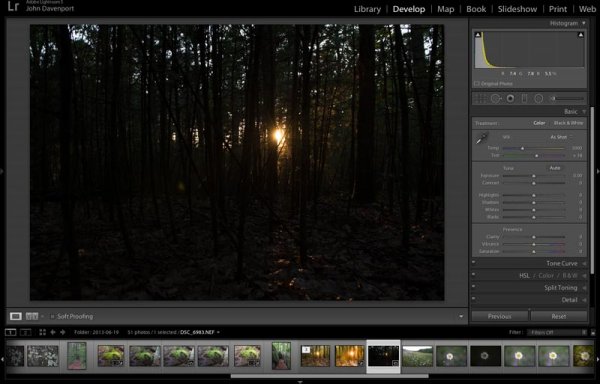
Original RAW file in Lightroom
Before we can use Simplify however, we do need to get the photograph into some sort of usable shape. For this photograph I've got to really rely on Lightroom's power of saving an underexposed image which it handles without too much of a problem.
After some adjustments in Lightroom 5 using a combination of sliders in the basic tab, you can see that the photograph is at least now in a condition that Simplify will be able o handle.
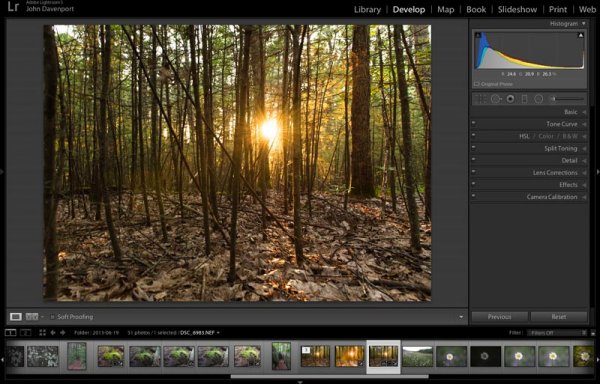
After some basic Lightroom adjustments
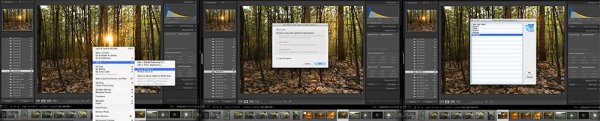
To use Topaz Simplify in Lightroom you'll also need the free Fusion Express plugin (download it here) which is what launches all of the Topaz products. Once both programs are installed launch Topaz Simplify by right clicking on your photo. Navigate to EDIT IN > FUSION EXPRESS 2.
You can see this in more detail in the video below
Next, a dialog box will open up asking you to select how you'd like the photograph to be brought into Topaz Simplify there are three options here - I always choose 'create a copy with Lightroom adjustments' as the other two work off the original file in Lightroom. Note: if this is an area of confusion for you, you'll be able to see this process in more detail in the video below.
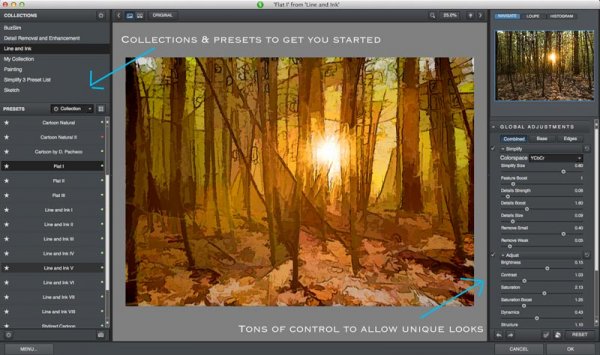
Topaz Simplify preset and adjustment options
Next try the ready-made presets that come with Simply
Once you've launched Topaz Simplify you'll be brought into a new editor screen with a bunch of prepackaged collections filled with different presets.
On the left-hand side, as you can see from the screen shot above, the Line and Ink collection is currently selected. There are a handful of other collections, each one containing a different set of presets, all of which are great when you're just getting started with Topaz Simplify. I highly recommend just playing around with them to find out which ones suite your own creativity best, before getting to involved with the rest of the program. Here are a couple more variations on the photograph above that I achieved with just a few mouse clicks using presets.
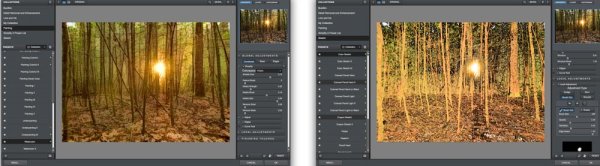
A couple more Topaz Simplify variations.
Customize and play
However, once you have gotten used to the presets and found the ones you like, you also have a lot of control to make the images your own through various adjustment options.
The right-hand panel offers the ability to control things like the overall intensity of the Simplify effect, the ability to determine which edges are drawn in harder or removed entirel,y and the ability to modify how much overall detail is pulled out from the scene.
You also have access to some options for basic image adjustments should you need to do some minor contrast, brightness or saturation modifications (though I'd suggest waiting on these until you get back into Lightroom).
Finally - one of the best parts of Simplify - is that Topaz decided to include bunch of great local adjustment options allowing you to burn, dodge, smooth and/or brush out the effects of Simplify in specific areas of your photograph.
For a look at Topaz Simplify in action watch the video below where I run our second photograph from the two before and after images above through Simplify.
Topaz Simplify Basic Video Walkthrough
What do you think? Have you simplified a photo?
So after this basic walk through I'd love to hear your thoughts on the software. If you do go ahead and use it, or have done so in the past, how about a sharing one of your favorite before and after image sets in the comments below - I'm curious to see what you're able to come up with.
The post Create Art with your Photos Using Topaz Simplify by John Davenport appeared first on Digital Photography School.
No comments:
Post a Comment